
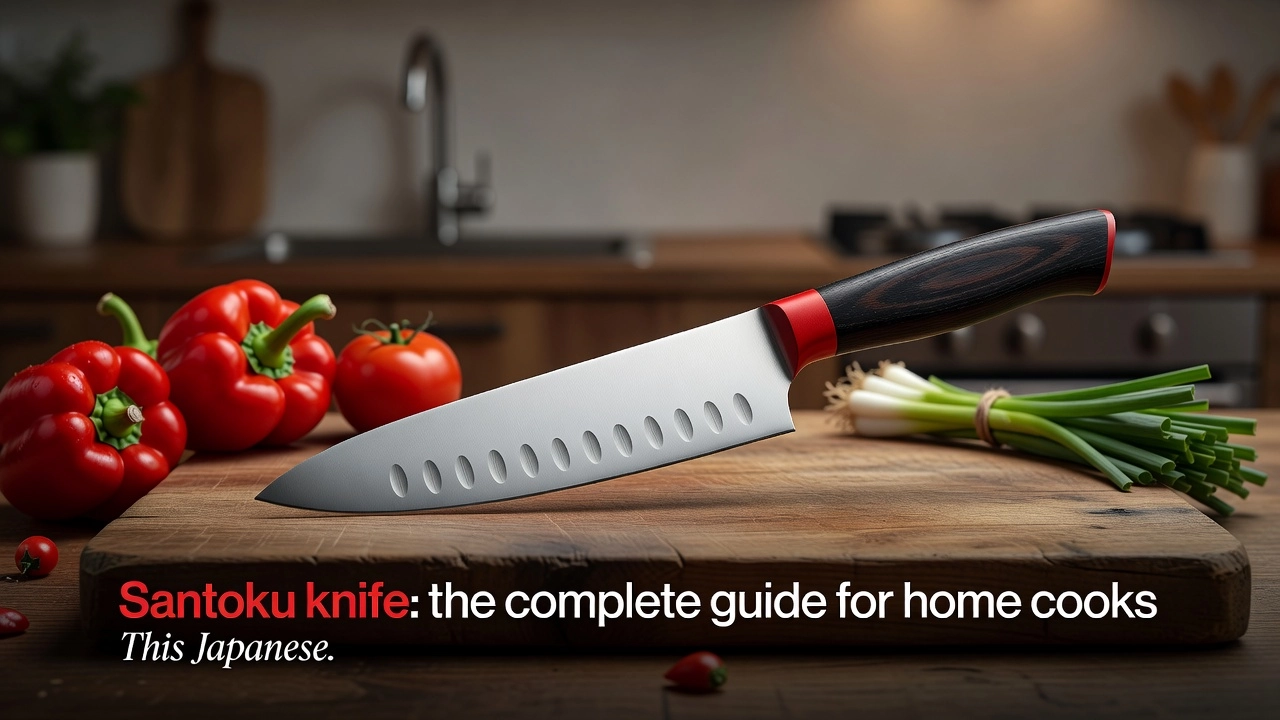
If you have spent any time browsing kitchen knives, you have almost certainly come across the santoku knife. This Japanese-style blade has taken the culinary world by storm, and for good reason. It is versatile, comfortable to hold, and surprisingly easy to master, even if you are completely new to cooking.
But with so much information out there, it can feel overwhelming to know where to start. What makes a santoku knife different from a chef’s knife? How do you choose the right one? And once you have it, how do you use it properly?
This guide answers all of those questions and more. Whether you are buying your first serious kitchen knife or simply trying to understand the tool already sitting in your drawer, you are in the right place. We will walk you through everything from the knife’s origins and key features to practical tips on cutting techniques and proper care. By the end, you will have the confidence and knowledge to make the most of one of the most useful knives in any home kitchen.
What is a santoku knife
The word santoku (三徳) translates as “three virtues,” and the name tells you exactly what the knife is built to do. Those three virtues refer to the three food categories it handles: meat, fish, and vegetables. Some sources frame them instead as three cutting actions, slicing, dicing, and mincing. Either way, the promise is the same. This is a general-purpose blade, not a specialist tool.
The santoku emerged in Japan during the 1940s and 1950s, a period when Japanese home cooking was shifting toward more meat-inclusive meals. Traditional Japanese knives were optimized for fish and vegetables. A new dietary reality required a new knife. The solution was a hybrid: designers crossed the nakiri, a rectangular vegetable-cutting knife with a flat edge, with the gyuto, Japan’s adaptation of the Western chef’s knife. The result was the santoku.
That ancestry shows up directly in how the knife is built. Blade length runs 150 to 180mm, roughly 6 to 7 inches. The edge profile is nearly flat, with minimal belly curve. The tip follows a sheepsfoot shape, meaning the spine curves downward to meet the edge rather than the edge sweeping upward to a point. Construction is double-bevel, meaning it is ground on both sides, so it works for right- and left-handed cooks equally. Weight sits in the 100 to 170g range, noticeably lighter than a comparable Western chef’s knife.
The heritage is not just history. It explains the knife’s behavior in your hand. The flat edge inherited from the nakiri makes the santoku a natural push-cutter: you press straight down through the ingredient rather than rocking the blade forward. The gyuto DNA is why the knife handles chicken thighs and fish fillets without struggling. Remove either ancestor and you have a different knife entirely.
This is Japan’s most popular home kitchen knife, and for a Western cook buying their first Japanese blade, it is the most logical starting point. The dimensions are familiar. The double-bevel grind requires no adjustment. The technique shift from rocking to push-cutting is modest. It delivers the thinner geometry, harder steel, and refined edge of Japanese knife culture without demanding that you unlearn everything you already know.
Blade geometry explained: what the numbers mean in the hand
Six numbers define how a santoku behaves before you ever touch food. Understanding them removes the guesswork from buying and using one.
Edge profile: built for push-cuts, not rocking
The santoku runs a nearly flat cutting edge from heel to tip. That flatness is intentional. A Western chef’s knife carries a pronounced curved belly designed for rock-chopping, a technique where the tip stays on the board and the heel arcs up and forward in a rolling motion. The santoku’s flat profile limits that motion by design, not by deficiency. What it gives you instead is maximum contact between blade and board on a straight downward push-cut or chop. For julienning carrots, slicing mushrooms, or dicing onions, that geometry is efficient and consistent.
Sheepsfoot tip: safer, with one tradeoff
The tip curves downward to meet the edge rather than tapering to a fine point. On a flat cutting board, that lower tip reduces the risk of accidental piercing and keeps your knuckles clear during quick repetitive chops. The tradeoff is real: fine-point work, scoring the skin on fish, or any task requiring precise tip control is harder with a rounded profile. A gyuto handles that kind of detail easily. The santoku does not pretend to.
Edge angle, HRC hardness, and why they connect
Most santoku leave the factory ground to 10 to 15 degrees per side. Most Western chef’s knives run 15 to 20 degrees per side. That narrower included angle produces a noticeably keener initial edge. The catch is physics: less metal behind the edge means less support. Push a santoku through a chicken joint, a frozen block, or a dense butternut squash and you risk chipping the edge.
Hardness amplifies this. The Rockwell C scale (HRC) measures how much a standardized steel ball indents a blade under load. A higher HRC means the steel resists deformation longer, so it holds that acute angle between sharpenings. Santoku steel typically runs HRC 58 to 63, harder than most Western knives at 56 to 58. Harder steel stays sharper longer. It also chips more readily under lateral stress or impact. Use the santoku on produce, proteins, and boneless fish. Keep it away from bones, frozen food, and hard seeds. That boundary is not optional.
You can find a deeper breakdown of how hardness, angle, and steel type interact in the santoku knife guide at Japanese Knife Lab.
Weight and grip
A santoku weighs 100 to 170 grams. A Western chef’s knife typically runs 150 to 250 grams. That difference is meaningful across a long prep session. Less mass means less fatigue when you are slicing through a pile of shallots or prepping vegetables for thirty minutes straight. The adjustment is that a lighter blade carries less momentum through a stroke. You supply the forward force deliberately rather than letting the blade’s weight do the work. Most experienced users shift to a pinch grip, thumb and forefinger pinching the blade just ahead of the bolster, which gives more control and compensates for the reduced pendulum effect.
Double-bevel construction
Almost every santoku sold in the US uses a 50/50 double bevel, equal angle ground on each side. That symmetry makes sharpening straightforward on a standard whetstone without any technique adjustments. Some higher-end or traditionally made Japanese santoku use an asymmetric grind, often 70/30 or 60/40. Those require a different angle on each side and may not perform correctly for left-handed users without re-grinding. For a first santoku, a 50/50 bevel is the practical choice. The Knife Depot santoku vs. chef’s knife comparison lays out how these geometry differences play out across real prep tasks if you want the side-by-side detail.
Steel grades mapped to real kitchen behavior
The steel your santoku is made from determines almost everything: how long the edge stays sharp, how it responds to hard vegetables, whether it will chip or simply dent, and how much work it takes to bring it back. Here is a plain-language map of the steels you will actually encounter, from the workhorses to the specialist grades.
1. Molybdenum-vanadium alloys: the entry-level workhorse
Molybdenum-vanadium steels sit at the bottom of the performance ladder and the top of the convenience chart. They are softer than VG-10 or AUS-10, typically landing in the HRC 56 to 58 range, which means the edge rolls rather than chips on hard food. Sharpening is easy: a few strokes on a basic whetstone or a pull-through sharpener will restore the edge quickly. These steels dominate the under $50 market. You are not getting elite edge retention, but you are getting a forgiving knife that handles daily use without drama.
2. AUS-10 (stainless, typically HRC 58 to 59): chip-resistant and easy to maintain
AUS-10 carries slightly less carbon than VG-10, which translates to a measurably softer and more impact-tolerant edge. Attack a butternut squash or a dense root vegetable with an AUS-10 santoku and the edge absorbs the stress rather than micro-chipping. Between full whetstone sessions, a ceramic honing rod is enough to realign the edge quickly. AUS-10 is a strong choice for cooks who want a low-maintenance blade that lands in the entry-level to lower midrange price band.
3. VG-10 (stainless, typically HRC 60 to 61): the midrange benchmark
VG-10 is the most common steel in the midrange santoku category and has been for good reason. Its fine carbide structure allows it to take and hold a sharper, more refined edge than AUS-10, and it responds reliably to whetstone resharpening without demanding specialist equipment. At HRC 60 to 61 it holds that edge noticeably longer than AUS-10 does. The tradeoff is a narrower margin for error. Apply lateral stress to a VG-10 tip while cutting through a hard carrot or squash and you risk a small chip. Use it correctly, with vertical push-cuts rather than rocking or twisting, and VG-10 rewards you with a edge that stays sharp through weeks of regular cooking.
4. VG-10 versus AUS-10: what the two-point hardness gap means at the cutting board
Two HRC points sounds academic. In the kitchen it is practical. VG-10 edges stay sharp longer between sharpening sessions. AUS-10 edges are more forgiving when technique is imperfect. Neither steel is better in an absolute sense. The right choice depends on how often you are willing to sharpen and how carefully you control your cuts on hard produce.
5. Silver Steel No. 3 (stainless): premium Sakai production, outstanding corrosion resistance
Silver Steel No. 3, known in Japan as Ginsan or Ginsanko, is a high-chromium stainless steel used predominantly by premium Sakai-region makers. Its corrosion resistance is better than VG-10, and its edge retention is better than AUS-10. It is less common in mass production, which means it commands a price premium. If you want near-carbon-steel sharpness with no rust anxiety, this is the steel to look for. Budget band: premium.
6. ZA-18 (stainless): Hitachi’s high-end alloy
ZA-18 is a Hitachi-produced stainless alloy with very fine carbide distribution and strong corrosion resistance. It sits alongside Silver Steel No. 3 in the premium stainless tier. You will find it in high-end production santoku rather than mass-market knives. Budget band: premium.
7. Blue Steel No. 2 / Aogami 2 (carbon, HRC 62 to 64): serious performance with a maintenance commitment
Blue Steel No. 2 is a Hitachi carbon steel with tungsten and chromium additions. It hardens to HRC 62 to 64 and takes a very refined, polished edge that holds exceptionally well. The catch is real: carbon steel reacts with moisture. Dry the blade after every use, and rinse it immediately after contact with acidic ingredients like tomatoes or citrus. Leave it wet and surface rust forms within hours. For an engaged home cook who takes care of tools, Blue Steel No. 2 is genuinely rewarding. For a cook who leaves knives in the drying rack, it is the wrong choice. Budget band: upper midrange.
8. White Steel No. 2 / Shirogami 2 (carbon): maximum initial sharpness, frequent sharpening required
Shirogami 2 is a purer carbon steel with minimal alloying additions. That purity allows an exceptionally sharp initial edge, sharper out of the gate than Blue Steel No. 2. It does not hold that edge as long, and it is at least as reactive. This is a steel for cooks who sharpen often and care most about how the knife feels on the first stroke, not how many weeks pass before it needs attention. Budget band: upper midrange.
9. HAP-40 and ZDP-189 (powder steels, HRC 65 to 67): outstanding retention, not beginner-friendly
HAP-40 is a high-speed powder steel. ZDP-189 is a Hitachi powder steel with extremely fine carbide structure. Both push HRC to 65 to 67, which delivers outstanding edge retention. The tradeoff is resharpening difficulty: standard whetstones struggle with these steels. You need diamond abrasives or very fine-grit synthetic stones, and the technique required is more demanding than with VG-10 or AUS-10. These are not first-santoku steels. Budget band: premium and specialist. For context on how the broader steel options map across actual tested knives, Serious Eats tested 19 santoku knives across this range of grades and geometries.
Budget band summary
| Steel | Band |
|---|---|
| Molybdenum-vanadium, AUS-8 | Under $50 |
| AUS-10 | Lower midrange |
| VG-10 | Midrange to upper midrange |
| Blue Steel No. 2, White Steel No. 2 | Upper midrange (carbon maintenance required) |
| Silver Steel No. 3, ZA-18, HAP-40, ZDP-189 | Premium |
Steel grade is the single biggest lever on long-term satisfaction. Match the grade to your actual maintenance habits, not to the sharpest-sounding specification sheet.
Regional origins: Seki, Sakai, and Echizen
Where a santoku is made shapes what it is. Japan has three production regions that matter to buyers, and each one signals something real about the knife you are considering.
Seki, Gifu Prefecture
Seki is Japan’s largest knife-producing region by volume. It is where the majority of Japanese-branded knives sold in US retail channels originate. Production in Seki ranges from fully automated factory output to semi-factory lines where skilled workers handle final grinding and finishing. That range is a feature, not a flaw. It means Seki supports everything from under-$50 entry knives in AUS-8 stainless to midrange options in VG-10 and AUS-10. For a beginner, a Seki-made santoku in a recognizable stainless steel grade is a solid, accessible starting point with good parts availability and consistent quality control.
Sakai, Osaka Prefecture
Sakai has more than 600 years of bladesmithing history. What makes Sakai production distinct is its division of labor: separate craftsmen handle the forging, the sharpening, and the handle fitting, each working to a specialist standard. The result is typically tighter blade geometry and more precisely executed grinds. Sakai santoku often feature asymmetric bevels, meaning more material is removed on one side to create a right-hand-biased edge that cuts cleaner through food. The price points are higher, usually midrange to premium. For a beginner, a Sakai knife may be a second or third purchase rather than a first.
Echizen, Fukui Prefecture
Echizen sits in Fukui Prefecture and is home to the Takefu Knife Village, a cooperative workspace where independent smiths share equipment and infrastructure. Echizen production leans heavily toward carbon steels, including White Steel and Blue Steel grades. Those materials hold an exceptional edge but require active maintenance. Echizen knives are less widely distributed in US retail than Seki brands, which means you are more likely to buy one through a specialist importer than at a kitchen store.
Spotting genuine Japanese-made knives
Vague labeling is the main thing to watch. Terms like “Japanese steel” or “Japanese-style” without a named production region, forge, or steel grade are red flags. A genuinely Japanese-made santoku will carry an explicit “Made in Japan” marking, typically a named city or region, and a specified steel grade. If any of those three elements is missing, assume the knife was made elsewhere and marketed with Japanese-adjacent branding.
Why origin connects to performance
This is not provenance pride. Hand-forging in Sakai and small-batch craft production in Echizen tend to produce more consistent heat treatment and tighter geometric tolerances than high-volume factory runs. Consistent heat treatment means the steel performs closer to its rated hardness across the full blade. Tighter geometry means the bevel angle is what the maker claims. Both factors directly affect how long the edge holds and how the knife moves through food. Origin is a reliable proxy for production standards when you cannot inspect the blade yourself.
Santoku vs. chef’s knife: which one actually fits your cooking
The short answer: your cutting habit matters more than any spec on the box.
If you learned to chop on a Western chef’s knife, you almost certainly rock-chop. The tip stays near the board, the heel lifts, and the curved belly does the work. The santoku’s flat edge profile does not support that motion. It will feel stuck, and your knuckles will tell you immediately. Push-cutters and straight-down choppers have the opposite experience. The santoku’s geometry rewards exactly those strokes, and the adjustment period is short.
What the santoku handles well, and where it stops
The santoku earns its “three virtues” name most clearly on vegetables, aromatics, and boneless proteins. Thin-sliced cabbage, minced shallots, chicken breast, salmon fillet: all of these are well within its range. Where it runs into trouble is on large bone-in cuts. Breaking down a whole chicken or working through a bone-in roast asks for the length, weight, and pointed tip of a full Western chef’s knife. The santoku’s sheepsfoot tip also limits precision detail work, scoring, and any task where you need the point to pierce before the edge follows.
Board contact and fine dice
The flat profile keeps more of the edge on the board during a straight-down chop. That geometry is a genuine advantage on fine dice work, brunoise, tight julienne cuts, once you stop trying to rock and start chopping. The efficiency gain is real, but it only shows up after technique has adjusted.
The length question
A 180mm santoku runs about 30mm shorter than the standard 210mm (8-inch) Western chef’s knife. That gap matters in two situations: smaller hands and tighter prep spaces. A shorter blade is easier to control when your hand is not large enough to grip a full 8-inch handle comfortably, and it maneuvers better on a compact cutting board.
Who should choose the santoku
Pick the santoku if your prep skews heavily toward vegetables and boneless proteins, if you have smaller hands, or if this is your first step into Japanese knives. The santoku is the most accessible entry point in that category, and the geometry translates to a learning curve measured in days, not months.
Who should stay with a chef’s knife
Stay with the chef’s knife if rock-chopping is muscle memory you have no interest in retraining. Also stay with it if you regularly break down whole birds or bone-in roasts. One knife that covers coarse butchery through fine prep is the chef’s knife’s strongest argument, and the santoku cannot fully replicate it.
Best santoku knives by use case and budget
Every pick below follows the same structure: steel grade, HRC, blade finish, handle type, budget band, who this is for, and who should skip it. All assessments are grounded in manufacturer specifications, independent tests and owner reports, not manufacturer spec sheets alone. We look for evidence from standardized prep tasks (cabbage julienne, onion dice, tomato slice, chicken cutlets) over a sustained period, then evaluate sharpness, edge retention, sharpening ease, and grip. If a knife does not earn its price in the hand, we say so.
Best santoku under $50: entry-level molybdenum-vanadium stainless
Be honest about what this budget buys. Most knives in the under-$30 range use steel hardened to around HRC 54. That apex dulls within days of regular use, and no amount of honing recovers it quickly. The practical floor for a credible Japanese santoku is right around $40.
At that price point, look for molybdenum-vanadium stainless or AUS-8 stainless. Both alloys sit in the HRC 57 to 59 range. The molybdenum content adds wear resistance; the vanadium refines the carbide structure so the edge holds a working sharpness longer than plain stainless. AUS-8 delivers similar results with slightly better corrosion resistance. Neither steel reaches the edge retention of VG-10, and both will need more frequent touch-ups on a whetstone or ceramic rod. That is a fair trade at this price, not a flaw.
Blade finishes at this tier are typically machine-polished. Handle options lean toward Western-style riveted composites or basic laminated wood. The fit and finish will not match midrange Japanese production, and that is expected.
Who this is for: First-time buyers who want a low-stakes introduction to Japanese knife geometry. If you have never held a 165mm sheepsfoot blade, this tier lets you learn the push-cut motion, evaluate whether a lighter knife suits your prep style, and decide whether you want to invest more, without risking real money. It is also a solid secondary knife for a prep station or a second kitchen.
Who should skip it: Anyone who can stretch their budget to the $70 to $90 range. The performance gap between entry-level and midrange is substantial, and the midrange tier is where Japanese santoku design genuinely delivers on its promise.
Best santoku for everyday midrange use: VG-10 at HRC 60 to 61
This is the tier where a santoku earns its reputation. VG-10 is a high-carbon stainless alloy with roughly 1 percent carbon, 15 percent chromium, and added cobalt to stabilize the martensitic structure during hardening. The result is a steel that reaches HRC 60 to 61 without becoming brittle in normal kitchen use. At that hardness level, you get a meaningful edge retention advantage over entry-level steels. A well-sharpened VG-10 santoku will hold a working edge through several weeks of daily home cooking before it needs attention.
The trade-off is modest. HRC 60 steel requires a finer sharpening touch than softer stainless. A coarse stone removes too much material; a 1000-grit stone followed by a 3000-grit finish stone is the appropriate approach. If you sharpen once a month on a whetstone, this knife will reward that habit consistently. Japanese Knife Lab’s 2026 santoku guide identified VG-10 at this price band as one of the strongest value propositions in the entire santoku market.
Blade finishes at this tier vary. Standard polished finishes are most common. Some manufacturers offer multi-layer clad construction, where softer stainless cladding protects a VG-10 core. The layering is functional, not just decorative, because it reduces the risk of lateral stress cracking the hard core. Handle types range from Western yo-style riveted handles to traditional wa-style octagonal or D-shaped handles in laminated wood or stabilized composite. The wa handle runs lighter and shifts balance toward the blade, which suits the push-cut technique well.
Who this is for: Engaged home cooks who prep daily or near-daily and are willing to use a whetstone once a month. This tier suits anyone ready to move past entry-level performance without committing to the maintenance demands of a premium or carbon steel knife.
Who should skip it: Cooks who want a no-maintenance knife they can treat casually. VG-10 at HRC 60 is not fragile, but it does not tolerate a dishwasher, a glass cutting board, or extended neglect.
Best santoku for the cook who wants carbon steel: Blue Steel No. 2 or White Steel No. 2
Carbon steel santoku knives occupy a different category entirely. Both Aogami No. 2 (Blue Steel No. 2) and Shirogami No. 2 (White Steel No. 2) are high-purity carbon steels with very low alloy content. Shirogami is essentially iron and carbon, which makes it extremely responsive to sharpening. Aogami adds chromium and tungsten, which increases wear resistance and makes the steel slightly more forgiving. Both steels reach HRC 62 to 64 in good hands, and both take an edge that outperforms most stainless options at the apex level.
The reactive nature of these steels is not a minor footnote. Without the chromium content of stainless, both alloys will develop surface rust within minutes of contact with moisture or acidic foods. That is not a defect; it is a material property. Managed correctly, the blade develops a protective patina over time that stabilizes the surface. But the management is non-negotiable.
Who this is for: The cook who dries the blade after every single use, stores it properly, and sharpens on a whetstone. If you enjoy the sharpening process and want the finest possible apex for delicate slicing tasks, Blue Steel No. 2 or White Steel No. 2 is the right direction.
Who should skip it: Anyone who leaves knives in a drying rack while wet, uses a dishwasher, or preps acidic ingredients and sets the knife down for extended periods. This is also not the right choice if sharpening feels like a chore rather than a routine.
Best santoku for the serious enthusiast: premium-tier steels
At the premium tier, the conversation shifts to ZA-18, Silver Steel No. 3 (Ginsan), and HAP-40. Each represents a different engineering approach to maximum performance.
Silver Steel No. 3 (Ginsan) is semi-stainless: enough chromium to resist everyday corrosion, enough carbon to reach HRC 61 to 63 and take an edge that approaches carbon steel quality. It is the most practical premium steel for a cook who wants refinement without a full reactive-steel maintenance commitment.
ZA-18 is a premium stainless developed in Japan with an alloy composition that achieves HRC 63 with strong toughness, which is an unusual combination. Edge retention is excellent, and the steel responds well to fine-grit finishing.
HAP-40 is a powder metallurgy high-speed steel. The fine, uniform carbide distribution allows it to reach HRC 65 to 67 while maintaining reasonable toughness for a kitchen knife. The edge retention at that hardness is in a different class from conventional stainless. The trade-off is real: resharpening HAP-40 on a standard whetstone is slow and inefficient. A diamond stone or a very hard fine-grit Japanese natural stone is the correct tool. Technique matters more here than at any lower tier.
Who this is for: Enthusiasts who have already developed consistent whetstone technique and want a knife that rewards that skill with sustained, high-level edge performance.
Who should skip it: Anyone who does not yet have confident whetstone technique. A misused diamond stone on an HAP-40 blade will cost you performance you paid a significant premium to access.
Best santoku for small hands or tight prep spaces: 150mm options
The standard santoku runs 165mm to 180mm. The 150mm format is a meaningful size reduction, not a novelty. It suits cooks who found a 210mm Western chef’s knife genuinely unwieldy, not just unfamiliar. A shorter blade reduces tip-to-heel leverage, which makes precise tip work easier for smaller hands. It also fits compact prep stations and smaller cutting boards without the blade overhanging the edge.
The 150mm format is available across all steel tiers described above. Lighter handle profiles, including thin oval or D-shaped wa handles, reduce overall weight to the lower end of the 100g to 140g range. That weight reduction matters during extended prep sessions where wrist fatigue accumulates.
Who this is for: Cooks with smaller hands, compact kitchens, or anyone who consistently found longer blades tiring or imprecise. This is also a strong second knife for a cook who uses a longer blade for primary prep and wants something more maneuverable for detailed work.
Who should skip it: Cooks who do high-volume prep. A 150mm blade requires more repositioning strokes to break down large vegetables compared to a 180mm blade. Food and Wine’s santoku testing coverage notes that blade length meaningfully affects efficiency in larger prep tasks.
A note on Damascus and specialty finishes
Kurouchi, Tsuchime, Nashiji, Kasumi, and Damascus are surface treatments and aesthetic choices. They are not performance categories.
A Kurouchi (blacksmith’s) finish leaves forge scale on the blade face. The slightly textured surface can marginally reduce food sticking friction during push cuts. The effect is real but minor. It does not change the steel’s hardness, edge geometry, or wear resistance.
Tsuchime (hammered), Nashiji (pear-skin), and Kasumi (misty) finishes similarly affect surface texture and visual character. Damascus patterning is a lamination technique that produces a visible grain in the cladding layers. On a properly made knife, the Damascus cladding protects the core steel. The pattern itself does not affect the cutting edge.
The rule is straightforward: evaluate steel grade, HRC, grind geometry, and handle fit first. If two knives are equal on those factors and one has an aesthetic finish you prefer, that preference is legitimate. Paying a significant premium for aesthetics alone, while accepting lower-grade core steel, is not a trade worth making.
Sharpening a santoku: angle, technique, and tools for home cooks
Sharpening a santoku correctly comes down to one number: 15 degrees per side. That is the angle that makes a Japanese bevel what it is. Go steeper and you are rebuilding a thicker, more obtuse wedge that belongs on a German chef’s knife, not on a 60+ HRC blade designed for precision slicing. Go shallower and the edge becomes fragile at the apex. Stay at 10 to 15 degrees and the geometry works exactly as the steel was heat-treated to support.
Setting that angle freehand takes practice. Two reliable methods for beginners: use a clip-on angle guide (available from most sharpening suppliers) or use the marker test. Coat the bevel with a black permanent marker, make three to five light strokes on the stone, then look at the wear pattern. If the marker disappears only at the very tip, your angle is too steep. If it disappears only at the shoulder, you are too shallow. Even removal across the full bevel means you are on the correct angle. The marker test costs nothing and gives you immediate feedback. For a full walkthrough of angle-setting technique, see our whetstone sharpening guides for extended reference.
The flat profile works in your favor
The santoku’s flat edge profile is a genuine advantage on a whetstone. Because there is minimal belly curve along the cutting edge, you can run consistent heel-to-tip strokes without progressively lifting the spine to follow a curve. On a curved Western chef’s knife that lift-and-sweep motion takes time to learn. On a santoku the stroke stays close to uniform from start to finish, which makes it easier to hold a steady angle throughout the pass. For beginners new to whetstone work, this is a real benefit.
Whetstone grit sequence
Follow a three-stage progression based on edge condition. Start at 400 to 800 grit only if the edge is chipped, damaged, or very dull. This coarser stage removes steel to re-establish the bevel geometry. For routine resharpening on an edge that is simply dull but undamaged, start at 1000 to 2000 grit. This is the most common entry point for home cooks maintaining a santoku that sees regular use. Finish at 3000 to 6000 grit to refine and polish the apex to a clean, consistent edge. After the final grit, strop on leather or firm cardboard. Stropping aligns the apex and clears any remaining wire burr without removing steel, which matters especially at a thin 15-degree bevel where micro-burr formation is significant.
Most water stones below 3000 grit require soaking for five to ten minutes before use. Stones above 3000 grit are generally splash-and-go. Check the manufacturer’s guidance for your specific stone.
Pull-through sharpeners and honing rods
Do not use a pull-through sharpener on a Japanese santoku. These devices are calibrated to 20-degree-per-side Western geometry. Running your santoku through one widens the bevel to that fixed angle, removes unnecessary steel, and erases the geometry advantage you paid for. Recovering a bevel that has been widened this way requires significant whetstone work to regrind back to 15 degrees.
Honing rods require the same caution. A fine ceramic rod is appropriate for stainless santoku grades such as VG-10, used at the correct 15-degree angle. A grooved steel rod is too aggressive for Japanese steels at HRC 60 and above. The harder, more brittle microstructure is prone to micro-chipping under the impact of a coarse grooved rod. If your santoku is carbon steel, skip the rod entirely. Carbon steel is reactive and honing can accelerate oxidation at the edge. Use a leather strop for carbon grades only.
How often to sharpen
At a 15-degree bevel, VG-10 and comparable stainless grades hold a working edge through several weeks of daily home cooking before a full whetstone session becomes necessary. Frequency also depends on your cutting board surface (wood is far kinder to an edge than glass or ceramic) and your most common ingredients (hard root vegetables dull an edge faster than proteins). Between whetstone sessions, hone lightly with a ceramic rod every few cooking sessions to keep the apex aligned. For a step-by-step guide to sharpening angles by knife type, that resource covers the geometry in additional detail.
Buying a Japanese-made santoku from abroad: what US buyers need to know in 2026
Direct-from-Japan shopping is appealing. You get access to knives that never reach US retail, and the prices can look strong at first glance. But in 2026, the shipping terms matter as much as the listed price.
DDP vs. DDU is the key distinction. DDP (Delivered Duty Paid) means the seller covers all import duties, taxes, and customs clearance costs. You pay one number at checkout and nothing more on delivery. DDU (Delivered Duty Unpaid) means those charges land on you when the package clears US customs. A knife listed at a lower nominal price on DDU terms can arrive with a customs bill that pushes the total well above a DDP-priced alternative.
Why this matters right now. Several Japanese knife retailers are actively promoting DDP shipping as a selling point in 2026, a direct response to US tariff changes affecting imported cutlery. When you see that framing, it is not just marketing. It is a signal that the DDU alternative exists and that unaware buyers are absorbing costs the seller could have quoted upfront.
Before you buy from an overseas retailer, confirm whether the listed price is DDP or DDU. Then check US Customs and Border Protection guidance at cbp.gov for the applicable HTS code on kitchen knives with fixed blades. Duty rates change, and this note is general information only, not legal or tax advice. Verify current rates before purchasing.
The domestic alternative removes all of this. US retailers stocking genuine Japanese-made santoku knives, including authentic production from Seki and Sakai brands, price in full with no customs exposure. Factor that in before concluding a direct-import listing is the better deal.
Care and maintenance: keeping the edge and the blade
A santoku’s thin edge, ground at 10 to 15 degrees per side, is its greatest strength and its most vulnerable point. These five habits protect it.
Cutting board material
Use wood or plastic end-grain boards only. End-grain maple, walnut, and hinoki (Japanese cypress) absorb the blade’s impact rather than pushing it back. Soft polyethylene boards work too. Glass, ceramic, and hard marble surfaces have no give. They roll a Japanese edge far faster than they would a Western knife, because the santoku’s acute bevel has less metal behind it to resist deflection. Bamboo is harder than it looks and should be avoided.
Washing
Hand wash with warm water and mild soap, then dry immediately with a towel. Every cycle in a dishwasher exposes the blade to prolonged heat, caustic detergent, and standing moisture. That combination degrades wooden and composite handles, loosens rivets, and accelerates edge corrosion even on stainless grades. Wipe the blade down after acidic foods like tomatoes or citrus without waiting until the end of prep.
Storage
A magnetic strip or a fitted blade guard is the right answer. Knife blocks trap moisture between the blade and the slot walls, and the repeated contact dulls the edge over time. Loose drawer storage chips edges through contact with other utensils.
Carbon steel extra steps
Dry carbon steel blades completely after every use. For storage beyond a few days, apply a thin coat of food-safe mineral oil or camellia oil to the blade face. Avoid cooking oils, which turn rancid. A gray or bluish patina that develops with normal use is protective, not damage. It forms a barrier against further oxidation. Do not scrub it away.
Handle maintenance
Wa handles, the octagonal and D-shaped Japanese styles, use a hidden tang fitted into the handle. If the fit loosens over time, a craftsman can retighten or replace the handle entirely. Western bolster handles with full tangs and pinned scales are largely permanent. Occasional mineral oil on bare wood wa handles prevents cracking in dry climates.
The bottom line
The santoku is the right first Japanese knife for most Western home cooks who focus on vegetables and boneless proteins and are willing to adjust away from the rocking chop. That technique adjustment is the only real barrier.
After budget, steel grade is your most important decision. AUS-10 gives you resilience and forgives harder use. VG-10 delivers the best midrange edge retention and is the grade most serious home cooks should default to. Blue Steel No. 2 produces a finer, keener edge than either, but it demands a whetstone and post-use drying every time. Pick the steel that matches your actual maintenance habits, not your aspirational ones.
Verify origin before buying. “Japanese-style” is a marketing description. It is not a geographic certification. Confirmed city or prefecture of manufacture is what matters.
Protect the sharpening angle. The 10 to 15 degree bevel is where the performance lives. A pull-through sharpener set to 20 degrees physically re-grinds that geometry and erases the advantage. Use a whetstone or a guided system set to the correct angle. For technique guidance, this beginner santoku skills video covers the fundamentals clearly.
Read the Steel Snob full reviews for individual model assessments built on manufacturer specifications, independent tests and owner reports. Every recommendation on this site is editorially independent.
Conclusion
The santoku knife is one of the most rewarding tools you can add to your kitchen. It is versatile enough to handle everyday tasks, comfortable for cooks of all skill levels, and easier to master than most people expect. By understanding its unique design, choosing the right blade for your needs, and practicing proper cutting technique and care, you can unlock everything this remarkable knife has to offer.
Now it is time to put that knowledge into action. If you do not yet own a santoku, use this guide to find the right one for your budget and cooking style. If you already have one, revisit your technique and maintenance habits. Either way, the path to more confident, enjoyable cooking starts with the right tool, used well. Pick up your santoku and start cooking.