
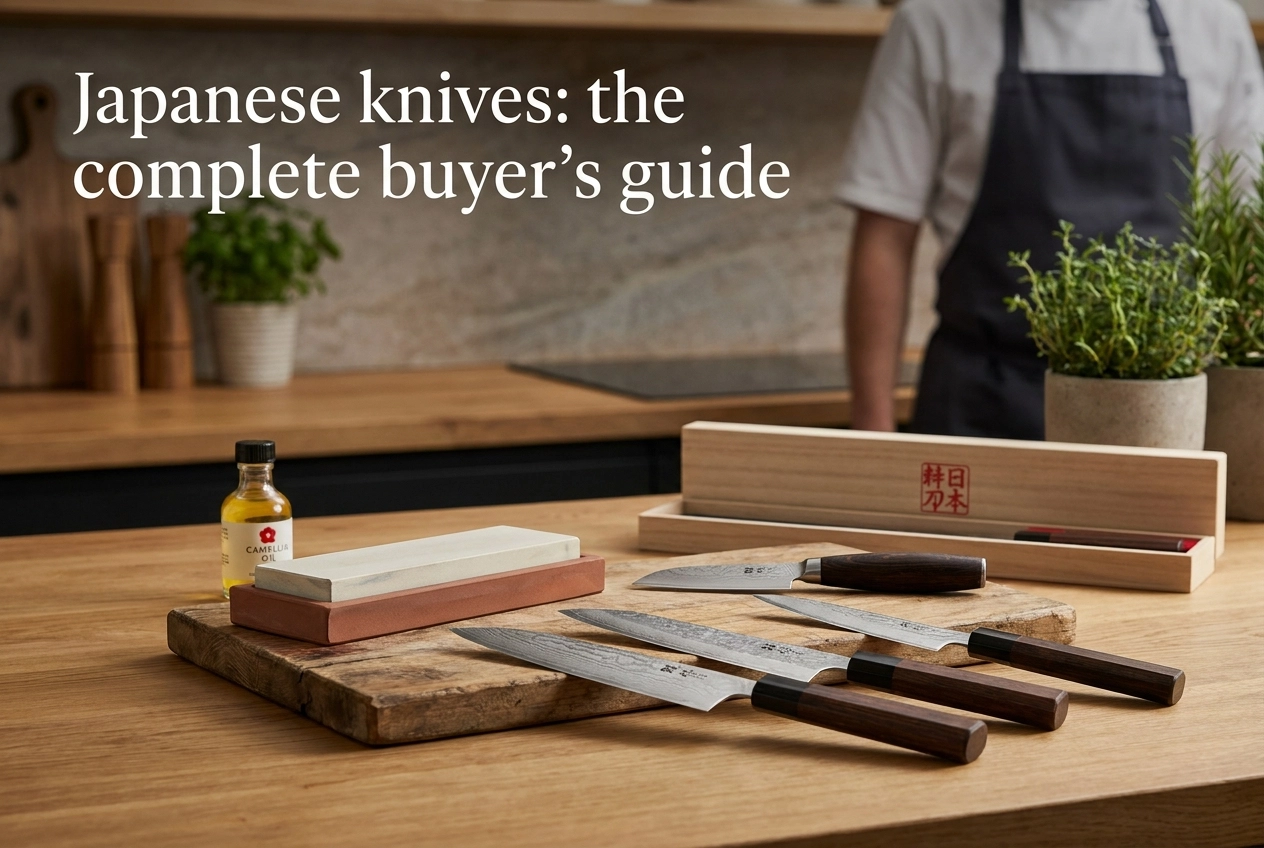
There is a reason professional chefs around the world treat their Japanese knives like prized possessions. These blades are not just kitchen tools; they are precision instruments crafted through centuries of tradition, offering a level of sharpness and control that most Western knives simply cannot match.
If you are new to the world of Japanese knives, the options can feel overwhelming. With dozens of styles, steel types, and price points to consider, knowing where to start is half the battle. That is exactly why we put this guide together.
In this complete buyer’s guide, you will learn everything a beginner needs to know before making a purchase. We will walk you through the most popular knife types, explain the key differences between them, and help you understand what to look for in terms of quality and value. By the end, you will have the confidence to choose a Japanese knife that suits your cooking style, your skill level, and your budget. Whether you are buying your first blade or expanding your collection, this guide has you covered.
Start here: the short answer for most buyers
Most home cooks should buy a 240mm gyuto in VG-10, AUS-10, or ZA-18 stainless steel with a double bevel. That one sentence covers the majority of buyers reading this guide. Everything else below is context for when that answer does not quite fit your situation.
The 240mm length works out to roughly 9.5 inches. That is long enough to break down a whole chicken breast or slice a large butternut squash in a single draw stroke, and short enough to stay manageable on a standard home cutting board. You do not need a restaurant-scale prep station to use one comfortably.
Double bevel means the blade is ground on both sides, the same basic geometry as any Western chef’s knife. You can sharpen it on a standard whetstone using the same motion on each side. Single bevel knives, which are ground on one side only, require a different technique entirely. That distinction matters for maintenance. This guide covers single bevel knives later, but the beginner recommendation stays firmly on the double bevel side.
Beyond this quick answer, the guide walks through blade type taxonomy organized by what you actually cook, the steel decision framed as a maintenance tolerance choice, bevel geometry, handles and finishes, how to spot a fake Japanese knife, and budget-band recommendations from under $50 up to premium territory.
One editorial note before you read further. Steel Snob takes no money from brands or retailers. Recommendations follow our documented testing protocol, and that protocol includes flagging when a popular or heavily marketed option does not justify the price premium. If a finish upgrade adds cost without adding performance, we say so. You can also find community-sourced perspectives on first Japanese knife purchases to compare notes with real buyers before committing.
The knife types explained: what you actually cook, not Japanese nomenclature
Japanese knives multiply fast once you start looking. Here is what each type actually does, mapped to what you cook rather than what the name means.
Gyuto: your first knife, full stop
The gyuto is the Japanese equivalent of a Western chef knife. Double bevel, thin spine, curved belly. Blade length runs 180mm to 270mm, and 240mm is the recommended starting size for most home cooks. It is long enough to break down a whole chicken or slice a large roast in one pass, but not so long that it feels unmanageable on a standard home cutting board. It handles proteins, vegetables, herbs, and general prep without compromise. If you buy one Japanese knife, this is it.
Santoku: better for choppers, not a gyuto replacement
The santoku runs shorter, typically 160mm to 180mm, with a flatter belly than the gyuto. That flat profile suits a straight up-and-down chopping stroke or a push cut. If you rock your knife through herbs and find yourself lifting the heel constantly, the santoku will feel more natural. Many production versions include granton hollows (small oval indentations along the blade face) that reduce sticking on foods like potato or cucumber. One limitation: the shorter length makes it ineffective on longer proteins. A whole side of salmon or a large pork loin needs more blade than a santoku provides.
Nakiri: one job, done exceptionally
The nakiri has a rectangular blade and a fully flat cutting edge. It was designed for vegetables and nothing else. Push-cutting, thin julienne, and working through dense produce like butternut squash or daikon are where its thin geometry earns its place. There is no tip, so protein fabrication tasks (breaking down poultry, trimming silverskin) are not in scope. If you cook plant-forward meals regularly and already own a gyuto for protein work, the nakiri is a strong second knife.
Petty: detail work, not a starter knife
The petty runs 120mm to 180mm and handles the close work a gyuto is too large for: peeling, hulling strawberries, trimming fat, and fine detail cuts. Think of it as the Japanese equivalent of a Western paring or utility knife. It is a secondary tool that fills a real gap once your collection grows, but it should not be your first purchase.
Kiritsuke and bunka: intermediate choices only
Both profiles combine elements of the gyuto and the nakiri. The kiritsuke features a distinctive angled tip (the k-tip) that adds versatility for precise cuts but requires a little technique to use without catching. The bunka is more forgiving, essentially a santoku with a pointed tip instead of a rounded one. Neither is a good first knife. Both reward cooks who already know how they cut and what they want from a profile. See the complete guide to Japanese knives for a full breakdown of kiritsuke variants, including the important distinction between the Western double-bevel kiritsuke-gyuto and the traditional single-bevel professional kiritsuke, which are two entirely different tools that share a name.
Single-bevel specialists: deba, yanagiba, usuba
These three predate the Meiji Period and were built for specific professional tasks. The deba is a thick-spined knife for fish butchery and breaking down whole fish at the bone. The yanagiba is a long, thin slicer optimised for raw fish, sashimi, and sushi preparation. The usuba is the single-bevel counterpart to the nakiri, used for thin, precise vegetable work in professional kitchens. All three are ground on one side only. That asymmetry demands real sharpening technique and means they are not practical everyday knives for most home cooks. Left-handed buyers face an additional hurdle: single-bevel knives require a specific left-hand grind, so verify orientation before purchasing. The Hasu-Seizo knife usage hub covers culinary applications for these specialist blades in more detail.
Sujihiki and honesuki: secondary protein tools
The sujihiki is a long, narrow double-bevel slicer, typically 240mm to 300mm, built for clean uninterrupted passes through large roasts, whole fish, and smoked proteins. It does that task better than a gyuto because the reduced blade height minimises drag. The honesuki is the Japanese boning knife: short, stiff, with a triangular blade and a sharp pointed tip designed for breaking down poultry and working around joints. Both are excellent tools. Neither belongs in a beginner’s first purchase. Build your skill on a gyuto first, then add these when the cooking tasks demand them.
Best Japanese knife for each use case
Each entry below names a blade type, explains the steel choice, and closes with a honest note on who should skip it. Budget bands (under $50, midrange, premium) are used throughout so the guidance holds as prices shift.
Best all-rounder for home cooks: 240mm gyuto in VG-10 or AUS-10
The 240mm gyuto is the right starting point for most people, and the reasoning is simple. Its curved belly supports both a rocking chop and a forward push cut. A single knife handles prep work across vegetables, boneless proteins, and herbs. VG-10 stainless, a cobalt-alloyed steel developed in Japan, sits at roughly 60 to 61 HRC. That hardness delivers real edge retention without making the blade brittle in normal kitchen use. AUS-10 is a close alternative: slightly lower chromium content, a touch easier to sharpen, and available at midrange prices. Either steel gives you a working edge that a 1,000 to 2,000 grit stone can restore without drama. This combination covers around 90 percent of what a home cook actually does at a cutting board.
Who should skip it: Cooks working on a small board, or anyone whose natural stroke is a straight up-and-down chop rather than a forward slice, will fight the 240mm length and the belly curve. A 165mm or 180mm santoku fits that technique better.
Best for vegetable-forward cooking: nakiri in stainless or White Steel No. 2
The nakiri has essentially zero belly. The entire edge contacts the board in a single downward push, which produces clean, precise cuts through dense vegetables without the wedging effect a curved blade can cause. If you cook plant-heavy meals regularly, nothing replaces it. Stainless versions in VG-10 or AUS-10 are low maintenance and suit cooks who do not want to manage a reactive surface. White Steel No. 2 (Shirogami #2) is a simple, high-carbon steel with minimal alloying. It takes a finer, keener edge than most stainless options and has a traditional following among serious home cooks. The trade-off is real: Shirogami reacts with acidic foods and moisture, building a patina over time. That patina is protective once established, but you need to dry the blade after every use and oil it periodically. Stainless is the lower-maintenance call for beginners.
Who should skip it: Anyone who also breaks down whole chickens, portions raw meat, or needs one knife to do everything. The nakiri’s flat profile and thin tip are wrong for those tasks. Buy a gyuto first, then add a nakiri as a second knife.
Best for slicing fish and proteins: sujihiki in SG2 or ZA-18
The sujihiki is a long, narrow, double-bevel slicer running 240mm to 300mm. Its low blade height is the point: less steel passing through flesh means less drag, which means cleaner slices with a single pull. This matters when you are breaking down a whole salmon loin or carving a large roast. SG2 (also sold as R2) is a powder-metallurgy stainless steel hardened to approximately 62 to 64 HRC. The powder process produces a finer, more uniform carbide structure than conventional stainless, which translates to a sharper, longer-lasting edge in a slim-profile blade. ZA-18 is a newer stainless option gaining traction as a credible alternative to VG-10 in the midrange segment, with improved edge retention and similar corrosion resistance. Both steels suit the sujihiki’s purpose well. Expect premium pricing for SG2 examples; ZA-18 sits at midrange.
Who should skip it: If you are not regularly slicing whole fish or carving large roasts, a 240mm gyuto handles occasional slicing tasks without adding a specialist blade to the drawer.
Best first knife under midrange budget: 210mm or 240mm gyuto in AUS-10 or AUS-8
AUS-8 and AUS-10 are Japanese stainless steels that sit at the budget and midrange tiers respectively. AUS-8 runs around 58 to 59 HRC, AUS-10 around 60 to 61 HRC. Neither demands polishing stones or careful angle discipline to sharpen. A 1,000 grit stone and a light honing habit will keep either steel in working condition. Quality AUS-10 gyutos are widely available at midrange. AUS-8 examples frequently fall under $50. The full range of stainless options across these tiers confirms that AUS-10 occupies a distinct category between entry-level and premium, making it the practical starting point for first-time buyers. These steels are forgiving. If you roll the edge on a bone or set the angle slightly wrong on the stone, you lose less than you would with a harder steel.
Who should skip it: Buyers with consistent whetstone technique and a premium budget. If you can maintain a 15-degree angle reliably on a stone, harder steels reward that skill with noticeably longer edge life.
Best premium upgrade: gyuto or bunka in SG2/R2 or ZDP-189
SG2 and ZDP-189 sit at the top of production knife steels. SG2 at 62 to 64 HRC is widely considered manageable on the stone while delivering longer intervals between sharpenings than VG-10. ZDP-189 exceeds 66 HRC. The finer carbide structure holds a keener apex for longer, but the steel is less forgiving of technique errors. Sharpen it at the wrong angle and you risk microchipping. The bunka is worth naming here alongside the gyuto: its angular tip gives better precision on fine cuts and garnishes while retaining enough belly for general prep work, and it showcases the edge geometry of powder steels well. A detailed overview of how SG2 and VG-10 differ at the carbide level confirms that powder metallurgy produces a measurably more refined structure, not just marketing language. Premium pricing applies throughout this tier.
Who should skip it: Anyone who has not yet developed consistent whetstone technique. A hard steel sharpened badly, with a rolled or chipped edge, performs worse than a well-maintained midrange knife. Build the skill first. The upgrade pays off only when your hands are ready for it.
Steel guide: stainless vs carbon and what the grades actually mean
The steel choice is not a prestige ladder. It is a maintenance tolerance decision. Carbon steel sits at one end: harder to keep, sharper potential. Stainless sits at the other: easier to live with, slightly less ceiling on sharpness. Neither is the correct answer for everyone. The right steel is the one that matches how much care you are prepared to give a knife every day.
1. VG-10: the benchmark stainless
VG-10 is the most common steel in the Japanese kitchen knife market, and it earned that position honestly. It runs around 60 to 62 HRC, which is hard enough to hold a fine edge through real kitchen use but forgiving enough that you can touch it up on a medium-grit whetstone without frustration. It responds well to a ceramic honing rod between sharpenings. You will find it across budget bands, from accessible midrange gyutos up to premium hand-forged pieces. For a first serious Japanese knife, VG-10 is the low-risk choice. Good edge retention, predictable behavior, and wide availability mean you can find quality examples without hunting. Hasu-Seizo’s steel type guide lists it as a primary collection category alongside every major alternative, which reflects just how thoroughly it dominates the market.
2. ZA-18: the emerging stainless challenger
ZA-18 has moved from niche to mainstream fast. It carries more vanadium than VG-10, and that matters: vanadium encourages smaller, harder carbides during solidification. Smaller carbides mean a cleaner edge geometry and measurably better edge retention under repeated use. The trade-off is sharpening difficulty. At the same grit as VG-10, ZA-18 takes more time and more consistent technique to bring back. If you are comfortable on a whetstone, that is a worthwhile trade. If you are still developing your sharpening skill, VG-10 will serve you better until the technique is there. Dedicated ZA-18 versus VG-10 comparisons are now appearing in the market, which signals that ZA-18 has enough of a following to justify direct head-to-head attention.
3. AUS-10 and AUS-8: practical entry-level stainless
AUS-8 typically lands at 58 to 60 HRC. AUS-10 sits slightly harder. Both are genuine Japanese stainless options and both are common in the under-midrange price band. The lower hardness is not a flaw: it means the edge is more forgiving if you catch a bone or hit a hard seed, and it means you can touch the edge up quickly on a ceramic rod or a low-grit stone without committing to a full sharpening session. For a first-knife buyer who is still figuring out their sharpening routine, AUS-8 or AUS-10 is a sensible starting point. You get real Japanese knife geometry and construction without the maintenance complexity of harder steels.
4. White Steel No. 1 and No. 2 (Shirogami): maximum sharpness, maximum commitment
Shirogami is high-purity carbon steel. The low alloy content means fewer obstacles to carbide formation, which translates to an exceptionally fine edge. Professional sushi chefs and serious home cooks who prioritize sharpness above everything else reach for Shirogami. The cost is real: the steel reacts with acids and moisture almost immediately. Leave tomato juice on the blade for five minutes and you will see a spot. Leave the knife wet overnight and you will find rust by morning. Shirogami requires immediate washing, immediate drying, and light oil storage between uses. It is not the right choice for a first knife. It rewards users who already know their sharpening angles and treat their knives as tools that need daily attention.
5. Blue Steel No. 1, No. 2, and Super (Aogami): reactive carbon with better wear resistance
Aogami adds chromium and tungsten to the Shirogami base. The chromium does not bring the steel into stainless territory; it is present in small amounts that improve wear resistance rather than corrosion resistance. The tungsten further increases hardness and edge retention under use. The result is a carbon steel that holds its edge longer than Shirogami before needing a refresh. Blue Super sits at the top of the Aogami hierarchy and offers the best wear resistance of the three grades. All three remain reactive. You still need to dry the knife immediately, store it carefully, and keep it away from acidic foods during prep. The maintenance commitment is identical to Shirogami. The payoff is an edge that lasts longer between sharpenings. Musashi’s carbon steel guide covers the Aogami grades in detail if you want to go deeper on the alloy differences.
6. Powder steels (SG2/R2, ZDP-189, HAP-40): engineered consistency at the top of the market
Powder metallurgy changes how steel is made at a fundamental level. Conventional steel is cast from molten metal, which allows larger carbides to form unevenly as the material cools. Powder steels are produced by atomizing the molten alloy into a fine powder, then pressing and sintering it under controlled conditions. The carbide distribution is far more uniform. The result is a harder, tougher steel with a finer edge geometry than conventional casting can produce. ZDP-189 can reach 67 to 69 HRC, which is among the highest hardness figures in the kitchen knife market. SG2 (also sold as R2) sits in the 62 to 64 HRC range and is more approachable. HAP-40 blurs the carbon and stainless boundary. All three reward consistent whetstone skill. At those hardness levels, a sloppy angle or the wrong abrasive will not move the steel, and dropping the knife on a hard surface risks chipping the edge. These are excellent steels for experienced users who have their sharpening protocol dialed in. They are not the place to start.
Single bevel vs double bevel: sharpening angles and who actually needs single bevel
Double bevel: what the angles actually mean for sharpening
Most Japanese knives are double bevel. That means the blade is ground on both sides to form the edge. What separates them from Western knives is not the fact of two bevels but the angle of those bevels. Japanese double-bevel knives are typically ground at 15 to 20 degrees per side. Most German and Western knives run 20 to 25 degrees per side. That difference looks small on paper. In practice, it changes everything about how you sharpen.
A shallower angle produces a keener, thinner edge. It also requires more deliberate wrist control on a whetstone. If you have been sharpening a German chef knife for years, your muscle memory is set to the wrong angle for a Japanese blade. You cannot simply apply the same motion at a steeper tilt and expect a good result. You will either round the edge or fail to raise a proper burr. The technique must change, not just the equipment.
One more thing to know about Japanese double-bevel knives: many are not symmetrically ground even within the double-bevel category. Ratios like 70/30 or 80/20 are common, with the larger bevel placed on the dominant-hand side. This affects how the blade tracks through food and how you maintain it on the stone. It is a frequent source of confusion for new buyers and worth understanding before you start sharpening. Our sharpening angle guide covers both 15-degree technique and asymmetric grinds in detail.
Single bevel: the geometry, the use cases, and the maintenance commitment
A single-bevel knife has one flat or hollow-ground back face and one fully beveled face. The entire cutting angle sits on that one side. The result is an extremely acute edge geometry, sharper and more precise than a double bevel for specific tasks. It is also more demanding to maintain.
Single-bevel construction is standard on three classic Japanese forms: the yanagiba (long sashimi slicer), the deba (fish-butchering knife), and the usuba (thin vegetable knife). Each is purpose-built. The yanagiba uses the single bevel to guide a long pulling cut through raw fish without tearing. The deba uses it to split through fish bones cleanly. The usuba enables paper-thin vegetable work including katsuramuki, the rotary peeling technique.
Handedness matters and is non-negotiable. Left-hand and right-hand single-bevel knives are not interchangeable. The bevel must be on the correct side for your dominant hand or the blade will deflect away from the cut line. Left-handed versions are also harder to source and typically carry a price premium. Confirm availability before you commit.
Sharpening a single-bevel knife is a distinct skill. The beveled face is worked at its established angle to rebuild the edge. The flat or hollow back is worked minimally, kept nearly flat against the stone, purely to remove the burr raised during bevel-side work. This is called the flat-back or ura technique. The hollow grind on the back, known as ura-oshi, is functional: it reduces the stone contact area when flattening the back, making burr removal easier and preserving geometry over time. Do not skip it or rush it. Practicing on an inexpensive knife before attempting this on a premium blade is not optional advice. It is the practical standard.
Who actually needs a single bevel
The answer is narrow. If you are preparing sashimi regularly, breaking down whole fish, or practicing specialized Japanese vegetable technique, a single-bevel knife is the correct tool. For everything else, including all standard home cooking, a well-maintained double-bevel gyuto or santoku reaches a performance ceiling that is more than adequate. The added maintenance complexity of a single bevel is a real cost with no return for most cooks. Start double bevel, learn the 15-degree whetstone technique, and revisit single bevel only when a specific task demands it.
Handle and finish: what actually matters vs what is marketing
Wa handle vs western handle
The handle style is a genuine ergonomic decision, not a prestige marker. Wa handles, the traditional Japanese style, are typically octagonal, D-shaped, or oval in cross-section, made from wood or composite materials, and noticeably light. That low weight shifts the balance point forward, toward the blade. If you use a pinch grip (index finger and thumb pinching the blade spine just ahead of the handle), a wa handle suits you well. The knife’s forward balance amplifies the cutting motion rather than fighting it.
Western handles are heavier, often bolstered, and built around a full tang that runs the length of the grip. Balance sits further back, closer to the hand. Cooks moving from German-style knives find this immediately familiar. The bolster also provides a natural finger stop, which some cooks find reassuring while they build technique. Neither style is better in any objective sense. The right answer is whichever handle lets you grip the knife comfortably for thirty minutes of continuous prep without fatigue.
One practical note for left-handed cooks: wa handles are far easier to swap or replace. Many makers sell the blade and handle separately, or offer rehandling services. A western handle on a fixed-tang knife gives you no equivalent option.
Blade finishes: what they do and what they do not do
Four finishes dominate the Japanese knife market right now.
Kurouchi is the dark forge scale left on the blade after forging and quenching. The smith deliberately does not polish it away. It gives the knife a raw, workshop aesthetic and provides marginal protection against surface oxidation. Some cooks find it reduces food sticking slightly, because the irregular micro-texture breaks suction between blade and food. It does not change the hardness, bevel angle, or edge geometry of the knife.
Tsuchime is a hammered finish applied after forging. The small dimples across the blade face create air pockets between food and steel, and the claimed benefit is reduced food adhesion. The effect is real but marginal. Tsuchime is primarily an aesthetic choice.
Nashiji, meaning pear skin, is a matte texture achieved through acid etching or mechanical finishing. Similar marginal food-release properties as tsuchime, softer visual appearance than polished steel.
Damascus, or pattern-welded steel, is multiple steel layers forge-welded together and etched to reveal a flowing wave pattern. The pattern comes entirely from the cladding layers, not the core. The edge is ground back to the core steel, which is where all cutting performance lives. Damascus tells you nothing about edge quality.
Damascus: the caution every buyer needs
Damascus patterning is the finish most frequently used to justify a higher price without delivering higher performance. The cladding that carries the pattern can be relatively soft stainless steel. The core can be excellent or mediocre. You cannot tell from the surface.
Before buying any Damascus knife, ask the seller to name the core steel and its HRC rating. Quality Japanese knives typically run 60 to 67 HRC. If the answer is “Damascus steel” with no further specification, treat the finish as decorative only and price accordingly. A knife with a verified VG-10 or Aogami core in a plain kurouchi finish is a better buy than a Damascus knife with an unspecified core at the same price. The 6 tips before buying a Japanese knife guide makes this point directly: steel type is the primary purchasing consideration.
Fit and finish as an authenticity signal
Physical construction tells you a lot before you ever cut anything. Genuine handmade Japanese knives show tight, flush ferrule-to-handle joins with no visible gaps, consistent grind geometry along the blade road, and clean kanji stamps identifying the maker and production region. Knives from established centers such as Sakai, Seki, and Tosa carry verifiable craft traditions behind those stamps.
Warning signals include a handle that wobbles or shifts, an uneven grind where one side of the bevel looks visibly different from the other, and country-of-origin labeling that is vague or absent. These are not cosmetic complaints. An uneven grind means the edge geometry is compromised before you start sharpening.
Who should buy on aesthetics
Choosing a knife partly on appearance is legitimate. If you are buying a gift, planning to display the knife, or simply find that you cook better with something you enjoy looking at, the kurouchi and Damascus market exists for good reason. The sequence matters, though. Confirm the core steel specification and HRC first. Then choose the finish. Never reverse that order.
How to spot a fake Japanese knife: a practical written guide
The fake Japanese knife problem is real, widespread, and costs buyers money. A large share of knives currently marketed as Japanese are manufactured in China or other regions with no connection to Japanese craft traditions, steel standards, or regional production systems. Consumer demand for guidance on this topic is high: a single video covering authenticity identification has accumulated over 314,000 views, which tells you how common the confusion is. The checklist below gives you seven concrete things to verify before you buy.
1. Check the country of origin marking
Genuine Japanese production knives carry a “Made in Japan” stamp. It appears on the blade face, the ricasso (the flat section above the heel), or the tang. Vague alternatives like “Japanese style,” “Japanese steel,” or “crafted with Japanese inspiration” are marketing language, not origin claims. Japan enforces strict rules on regional designations: a knife cannot legally carry the Sakai or Seki name unless it was actually made there. If you see no marking at all, treat it as an import of unknown origin until proven otherwise.
2. Verify the steel grade stamp
Legitimate knives name the steel. VG-10, Aogami Super, SG2, AUS-10, ZA-18, White Steel No. 2: these are real, documented grades with published compositions and hardness ranges. A knife that claims high performance but lists no steel grade is a red flag. Cross-reference any steel name you cannot recognize against published Japanese steel grades. If the name does not appear in steel manufacturer documentation or established importer listings, the provenance claim is unverifiable.
3. Inspect the grind geometry
Pick the knife up and look at the spine edge-on. A genuine Japanese knife has a noticeably thin spine that tapers toward the edge in a convex or flat grind profile. This geometry is the physical result of the blade’s hardness and the precision required to grind it correctly. A thick, wedge-shaped cross-section on a knife marketed as Japanese either indicates a very low-end production piece or a mislabeled import. The grind cannot be faked in a photo, which is exactly why marketplace listings rarely show a spine-on view.
4. Examine the handle fit and ferrule
On a wa-handle knife, the ferrule (the collar joining the handle to the blade) should sit flush with no visible gaps, cracks, or adhesive. Misaligned handle material, a wobbly fit, or a ferrule that shifts under hand pressure are signs of rushed production. Quality handle materials, whether ho wood, magnolia, or stabilized hardwoods, should be finished cleanly at every joint. This is an area where fakes consistently cut corners because the details are easy to miss in a low-resolution product photo.
5. Research the brand and its kanji
Legitimate Japanese knife-making regions have documented histories and traceable maker records. Sakai, Seki, Tosa, and Echizen are four of the most established. If a brand displays kanji but its name and address cannot be found through any established Japanese knife importer, retail context, or regional cutlery association, treat the provenance claim as unverified. A practical overview of how to spot a fake Japanese knife reinforces this point: brand research is consumer due diligence, not optional.
6. Use price as an early filter
Suspiciously low prices reliably signal lower material and production standards. Entry-level quality from genuine Japanese production runs in the midrange band. A knife offered at deeply discounted pricing with premium steel claims and regional heritage branding attached to it almost certainly does not deliver what it implies. This does not mean every affordable knife is fake, but it means the math needs to make sense given what real Japanese steel and skilled labor actually cost.
7. Buy from importers with documented sourcing
Generic online marketplaces allow any seller to list a product with any label. Established US importers with documented relationships to Japanese makers, clear return policies, and verifiable sourcing histories carry meaningfully lower risk. Identifying counterfeit knives is harder after purchase, which is why sourcing channel matters as much as the product itself. If a seller cannot name the specific maker, region, and steel grade of what they are selling, that absence of transparency is the answer.
What to buy first: recommendations by budget band
Budget shapes what you can buy, but it also shapes what you should expect. Here is what each tier actually delivers.
Under $50: test-drive tier
Options exist at this price, but the buyer needs to be honest about what the money buys. AUS-8 stainless is the steel you will almost certainly encounter here. It sits at roughly HRC 58-59, holds a working edge through normal home cooking, and resharpens quickly on a basic whetstone. Those are real virtues, especially for a first-time Japanese knife owner who is still learning sharpening angles.
What you will not get is the thin, consistent grind geometry or the clean fit and finish of a midrange Japanese production knife. The spine may feel rough. The bevel transition may be uneven. The handle fit is often the first place corners get cut.
Treat this band as a format test, not a long-term buy. It answers the question: do I like the way a lighter, thinner Japanese blade handles before I spend more?
Midrange: where the market earns its reputation
This is the band that justifies the entire category. VG-10 and AUS-10 gyutos from established production lines land here, and the difference in grind geometry, steel consistency, and handle quality over the entry tier is immediate. See the Steel Snob VG-10 reference page for the full metallurgy breakdown, but the short version is: meaningfully better edge retention than AUS-8, still accessible to sharpen on a whetstone.
A 240mm gyuto in this range is the single most recommended starting point on this site and across the broader community of serious home cooks. Wa or western handle, your choice based on grip preference. Most home cooks will never need to spend beyond this band. The whetstone basics for Japanese knives guide covers exactly what sharpening kit to pair with a knife at this level.
Premium: powder steel and craft hours
ZA-18, SG2/R2, and ZDP-189 are the steels you find here, alongside hand-finished grinds and maker-signed blades. The edge retention gains over VG-10 are real. They are also incremental for typical home cooking tasks. The premium reflects two things: the higher raw material cost of powder metallurgy stock, and the skilled labor hours in hand-finishing.
This tier makes sense for buyers who sharpen regularly on whetstones and want longer intervals between full sessions. Read the SG2 powder steel explainer before spending at this level so you understand what the steel actually requires.
A note on Japanese domestic pricing
If you are buying in Japan or from a Japanese-market importer, prices for equivalent knives run noticeably below US import retail. Kappabashi in Tokyo is the reference destination. Use the budget bands above as a sanity check on fair market value when shopping that channel, and factor in the lack of a US-based return or warranty process before committing to a purchase.
Keeping the edge: sharpening and maintenance basics for Japanese knives
Japanese knives are ground at shallower angles than Western knives, and that single fact drives every maintenance decision you make. Most gyutos are sharpened at 15 degrees per side or less. German knives typically run 20 to 25 degrees per side. The thinner geometry produces a keener edge but also a more fragile one. A coarse ridged honing steel designed for German knives will roll or chip that edge in a single stroke. Use a ceramic honing rod for quick touch-ups between sharpenings, or go straight to a fine whetstone. Pull-through sharpeners are off the table entirely; they grind at a fixed, incorrect angle and remove more metal than necessary.
Whetstone progression
Whetstones are the right tool for Japanese knives. The two-stage progression covers most situations. Start with a medium grit stone, around 1000, to set or refresh the bevel. This is where you remove metal and re-establish the edge geometry. Follow with a fine grit stone in the 3000 to 6000 range to refine and polish the edge. For powder steels such as SG2, ZDP-189, or HAP-40 sitting at 65 HRC and above, expect to spend noticeably more time on the 1000-grit stone before the steel responds. The hardness that gives those steels long edge retention is the same hardness that slows abrasion. Budget more time, not more pressure. Steel Snob’s full whetstone guide for Japanese knives covers stone selection, soaking versus splash-and-go, and angle-holding technique in detail.
Carbon steel care
Carbon steel knives, including those in White Steel and Blue Steel grades, need to be rinsed and dried immediately after every use. Leaving moisture on the blade for even a short period is enough to start surface rust. A natural patina will develop with normal use and provides mild protection against corrosion. You can accelerate this with a forced patina using mustard or vinegar, which stabilizes the surface color and creates a more uniform oxide layer. That helps aesthetically and provides a small functional benefit, but it does not replace the habit of drying the blade after every single use. The patina is maintenance support, not a substitute for it. Never put any Japanese knife in the dishwasher; the heat, moisture, and alkaline detergents will degrade both the steel and the handle.
Cutting surfaces and storage
The board you cut on affects how long the edge lasts. Wooden end-grain boards and soft plastic boards absorb the blade on contact rather than deflecting it. Glass, ceramic, and hard composite boards will blunt a Japanese knife quickly, regardless of steel grade or HRC rating. This is not a minor consideration. A hard board can undo a careful sharpening session within a few prep sessions.
Storage matters equally. A magnetic knife bar keeps the blade clear of all contact surfaces. A blade guard or wooden saya works well for transport or drawer storage. A knife block is less ideal because the blade contacts the interior slot walls at unpredictable angles on every insertion and removal. How often you should sharpen depends on use frequency and steel, but correct storage extends the interval between sessions. Loose in a drawer is never acceptable; it damages the edge and creates a safety hazard.
The bottom line
Start with the answer, because the answer has not changed: buy a 240mm double-bevel gyuto in VG-10, AUS-10, or ZA-18 stainless steel, and buy it only from a seller who can document both the steel grade and the country of manufacture. That pairing covers the majority of buyers at every budget band.
The most underrated factor in that decision is still maintenance. The best steel for you is the steel you will actually sharpen and dry and store correctly. A carbon knife sitting in a damp drawer will underperform a well-maintained AUS-8 every single time. Honest self-assessment here matters more than any hardness rating.
On fakes: look for a “Made in Japan” stamp, a named steel grade, and a tight, rattle-free handle fit. If any of those three markers are absent, keep looking.
From here, use Steel Snob’s steel reference pages to compare individual grades, the sharpening how-tos to build the maintenance habit before you buy, and the use-case roundups to narrow to a specific blade for your kitchen.
One last point worth stating plainly: no brand funds this site, no retailer shapes what we publish, and the verdict on any knife is the same whether it is currently trending or not. That independence is the whole point.
Conclusion
Choosing the right Japanese knife does not have to be complicated. By understanding the key knife styles, knowing how steel type affects performance, and matching your choice to your cooking habits and budget, you are already ahead of most buyers walking into a kitchen store blind.
The most important takeaways are simple: start with a versatile all-purpose blade like a gyuto or santoku, prioritize quality steel over flashy aesthetics, and buy from a reputable source that stands behind its products.
Now it is time to put that knowledge to work. Browse our recommended picks below, compare your top choices, and take the step toward owning a knife that will genuinely transform the way you cook. Once you experience the precision of a well-crafted Japanese blade, there is no going back.