
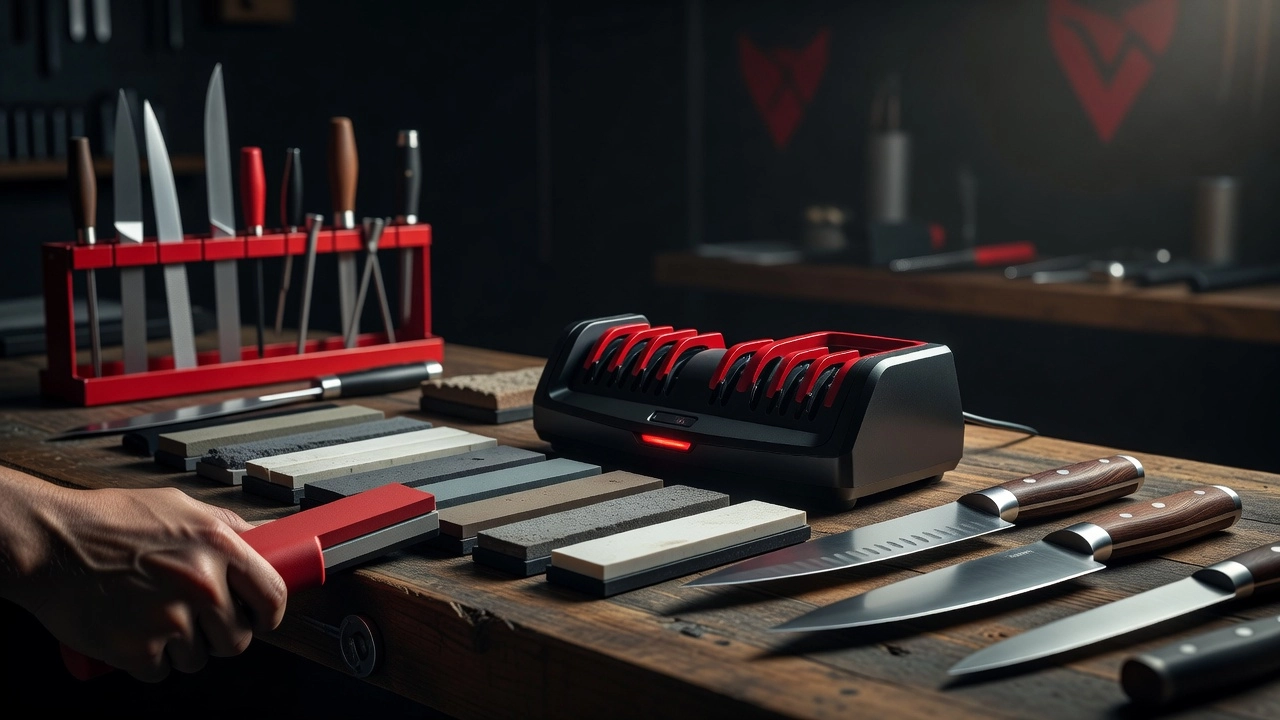
A dull knife is more dangerous than a sharp one, and if you have been struggling with inconsistent edges or shredded tomatoes, the problem might not be your technique. It might be your knife sharpener.
Not all sharpening tools are created equal, and using the wrong one for your specific blade can do more harm than good. A cheap pull-through sharpener might be convenient, but it could be stripping away more metal than necessary or failing to hold the right angle for your Japanese gyuto. Meanwhile, a whetstone that works beautifully on a hard steel chef’s knife might be overkill for a softer European blade that simply needs regular honing.
This guide breaks down the most important types of knife sharpeners available today and helps you figure out which one actually suits your knives. Whether you are working with a carbon steel workhorse, a high-end Japanese blade, or a basic stainless kitchen set, you will walk away knowing exactly which tool belongs on your countertop. Stop guessing and start sharpening with purpose.
The short answer before the details
The right knife sharpener depends on the steel in your knife. That is the whole answer. Everything else is detail.
For most home cooks running German-steel knives, typically in the 56 to 58 HRC range, a quality pull-through or electric sharpener is a practical choice. The steel is soft enough to tolerate the aggressive material removal of carbide slots, and the wider edge angle (usually 20 to 22 degrees per side) aligns reasonably well with the fixed geometry most consumer tools use. You will not get a whetstone-quality edge, but you will get a working one without learning a new skill.
For Japanese-steel knives, VG-10, SG2, and similar steels at 62 HRC or above, carbide pull-through sharpeners cause real damage. The steel is harder and more brittle. Carbide abrasives applied at the wrong angle do not refine the edge; they fracture it. A whetstone or a guided-angle rod system is the correct tool. Serious Eats tested 12 sharpeners specifically to sort this out by knife type, and the results reinforce this split clearly.
For EDC and pocket knives, blade geometry and edge type drive the decision. A plain edge on a flat-ground blade responds well to a diamond rod or compact field stone. Serrations are a different problem entirely, and most pull-through tools cannot address them at all.
For outdoor and hunting use, a coarse diamond stone paired with a ceramic finishing rod covers the majority of field sharpening situations. The diamond removes material fast enough to recover an edge after bone contact; the ceramic refines it back to a working finish. MeatEater’s 2026 gear guide covers this category with the field-use reader in mind.
The sharpener format matters less than steel compatibility. This guide explains the metallurgy behind each match, so you can make the right call for the knife you actually own.
The five sharpener formats and what each one actually does
Six formats exist. Each removes metal differently, requires a different skill level, and suits a different steel. Here is what each one actually does.
1. Pull-through sharpeners (manual)
Two V-shaped slots, each holding a carbide or ceramic abrasive, scrape metal from both sides of the edge simultaneously as you draw the blade through. The process is fast and requires zero skill in angle-holding. The problem is that the fixed angle cannot be adjusted to match your knife’s original geometry. Japanese knives are ground at roughly 15 degrees; most pull-through slots are set closer to 20 or 22 degrees. Running a hard, thin-ground Japanese blade (VG-10, SG2, anything above 62 HRC) through carbide slots risks microchipping the edge rather than refining it. On softer German steels in the 56 to 58 HRC range, the damage is less dramatic. Still, aggressive metal removal shortens blade life over time regardless of steel.
2. Electric sharpeners
Motor-driven abrasive discs or belts spin inside preset angle slots. You draw the blade through, and the motor does the work. Speed is the advantage over manual pull-through. The structural limitation is identical: fixed angles and a fixed abrasive grade mean you are still working around the tool rather than with your blade. Better electric models offer multiple stages, progressing from coarser to finer abrasives, which adds some refinement. Belt-driven units tend to produce a more consistent scratch pattern than disc-driven ones, but neither format gives you meaningful control over edge geometry.
3. Whetstones (bench stones)
A flat abrasive stone used freehand or with an angle guide. Grits typically range from around 120 for heavy reprofiling up to 8,000 or beyond for a polished, refined edge. You control the angle, the pressure, and the progression through grits. That control is the whole point. A whetstone is the only format that lets you match the sharpening angle precisely to the knife’s original geometry, work on specific sections of the edge, and apply the right grit for the steel’s hardness and intended use. Hard Japanese steels reward the patience of a fine stone. Softer steels can tolerate a more aggressive approach. The skill ceiling is real: proper whetstone technique takes practice, and maintaining a consistent angle freehand is the part most beginners underestimate.
4. Guided-angle rod and clamp systems
The knife is clamped in place, and the user draws a rod or small stone across the edge at a preset angle set by an adjustable pivot. You get whetstone-level control over grit progression without the freehand skill requirement. Guided clamp systems from manufacturers like Edge Pro allow precise angle matching across different knife types, making them a genuine bridge between pull-through convenience and bench-stone precision. The tradeoff is setup time and cost.
5. Rolling sharpeners (HORL-style and similar)
A disc abrasive rolls along the blade while a magnetic or mechanical guide holds the edge at a fixed angle. The concept is straightforward: eliminate freehand angle-holding while moving away from the aggressive bite of a carbide V-slot. The rolling motion distributes abrasive contact more evenly than a single-pass pull-through. This is an emerging format with real consumer traction, but buyers should confirm which angle settings are available before purchasing, since compatibility with Japanese knife geometry varies by model.
6. Field and pocket sharpeners
Diamond paddles, ceramic sticks, folding sharpeners, and compact pocket stones. None of these will produce a bench-stone result. That is not the point. The point is a working edge in the field, on a trail, or in a carry bag. Diamond-coated surfaces cut fast and work on harder steels. Ceramic sticks refine an edge that is already close to sharp. For EDC and outdoor use, portability beats ultimate edge quality every time.
Why your knife’s steel hardness determines which sharpener to use
The Rockwell C scale (HRC) measures how resistant a steel is to surface indentation. At a practical level, it tells you how hard the steel is and, by extension, how brittle it becomes at the edge apex. Higher HRC means better wear resistance and longer edge retention. It also means less tolerance for the mechanical shock and uncontrolled abrasion that aggressive sharpeners deliver.
German steels and carbide pull-through sharpeners
X50CrMoV15, the alloy in most Wusthof and Henckels production knives, typically runs 56 to 58 HRC. That range puts it in a relatively soft, tough category. Toughness, in metallurgical terms, is resistance to fracture rather than resistance to wear. A tough steel can absorb the sudden lateral stress a carbide pull-through imposes without shattering micro-chips from the apex. The steel deforms slightly, the carbide scrapes a rough bevel, and the edge is serviceable again. It is not elegant, but it works because the material can tolerate the abuse. For a busy home cook who wants a fast result and runs a German kitchen knife, a quality pull-through is a reasonable choice.
Hard Japanese steels require a different approach
VG-10 and SG2 typically run 60 to 64 HRC. The finer, denser carbide structure that makes them hold an edge for weeks rather than days is exactly what makes them fragile under aggressive sharpening. When a carbide pull-through drags across a 62 HRC edge, it does not cut a clean bevel. It scrapes and rolls micro-chips off the apex, leaving a degraded edge that looks sharp but fails under light cutting load. Whetstones, steels, and pull-through sharpeners each solve a different problem, and choosing the wrong one for a hard Japanese blade is a quick way to ruin an expensive knife.
Carbide content is a separate variable from hardness
CPM-S35VN and M390 can sit in roughly the same hardness window as high-end Japanese kitchen steels, but they carry large, hard vanadium carbides in their matrix. Those carbides are harder than a soft carbide scraper. Dragging the softer abrasive across the harder carbide particles produces uneven material removal, preferential wear around the carbide boundaries, and a degraded edge geometry. Hardness alone does not tell the whole story. Carbide size and distribution matter independently.
The practical threshold
Above roughly 60 HRC, the sharpening method needs to be precise and controlled. Whetstones, guided angle systems, and quality electric sharpeners fitted with diamond or ceramic abrasive wheels are the right tools. Below 60 HRC, there is more tolerance for faster, less controlled methods. The rule scales directly: the harder and more carbide-rich the steel, the more care the sharpening process demands. Getting this match right is the single most important decision you make before touching an abrasive to a blade.
Why carbide pull-through sharpeners damage hard Japanese steel
A carbide pull-through sharpener works by pressing two hardened carbide rods or plates into a fixed V-configuration. You drag the blade through, and the carbide scrapes away steel to form a new bevel. There is no angle adjustment, no feedback, and no finesse. The method is brute abrasion, not controlled metal removal.
What happens on soft German steel
On a 56 to 58 HRC German steel, the edge apex is relatively ductile. The carbide grabs it, the edge rolls slightly under lateral stress, and then the abrasion scrapes the deformed metal back into something resembling a bevel. The result is crude. The geometry is imprecise. But the steel has enough give to absorb the mechanical punishment without fracturing. You lose more metal per pass than necessary, but the edge holds together. That is why pull-throughs became a kitchen staple: most Western-style knives tolerate them, at least for a while.
What happens on hard Japanese steel
At 62 or more HRC, the physics change entirely. Hard steel does not roll under stress. It fractures. When carbide rods grip the apex of a VG-10 or SG2 blade and apply lateral pressure, micro-fractures propagate back from the apex into the edge bevel. The result is not a rough-but-functional edge. It is a chipped edge with a jagged, weakened apex, and you have removed far more metal per pass than a whetstone would take in a full session. The edge feels temporarily sharper to the touch because the fractures create a toothy grab. Run it under magnification and the picture is different.
Independent tests evaluate sharpener damage under magnification after a defined number of passes, and we weigh that evidence heavily. On VG-10 steel, the micro-chipping pattern after carbide pull-through use is consistent and clearly visible at 20x. It is not a fluke result. It repeats.
Brand quality does not fix a broken mechanism
This is worth stating plainly. The problem is not that budget carbide pull-through sharpeners are poorly made. Even a well-constructed carbide pull-through causes this damage on hard Japanese steel, because the mechanism itself is incompatible with brittle, high-hardness alloys. There is no premium version of this tool that solves the problem. The fixed V-geometry and uncontrolled angle pressure are the design, not a flaw in the design.
Ceramic V-slot sharpeners are not a safe alternative
Ceramic rod sharpeners sit in the same V-slot category. They abrade less aggressively than carbide and generate less heat, so they are marginally less destructive on hard Japanese blades. Marginally. They still impose uncontrolled angle pressure. They still cannot match the 15 degrees per side that most Japanese double-bevel knives require. Using a ceramic pull-through on a 62 HRC santoku instead of a carbide one is a smaller mistake, not the right call.
The Reddit sharpening community consensus on this is consistent and mirrors what magnified independent tests show: pull-throughs are tolerable on soft Western steel and actively harmful on hard Japanese steel. The right tool for a quality Japanese blade is a whetstone or a guided-angle system that lets you hold the correct edge geometry. Anything that removes that control from you removes the thing that makes the blade worth owning in the first place.
Abrasive grit science: what the numbers mean and why they matter
Grit is simply a particle count. Manufacturers force abrasive grains through a standardized mesh screen, and the grit number tells you how many openings exist per square inch. More openings means smaller particles. Smaller particles cut less aggressively and leave a smoother surface. That inverse relationship is the whole system.
Lower grit numbers (120 to 400) mean large, coarse particles that bite deep and remove metal fast. They leave a toothy, rough apex that grabs well on soft materials but chips easily on brittle steels. Use this range to repair a chipped edge or establish a completely new bevel angle. Higher grit numbers (1000 to 8000) mean fine particles that refine and polish the bevel surface. An 8000-grit finish approaches a mirror, which suits slicing tasks where the blade needs to glide cleanly rather than grab. The sharpening stone grit chart at Sharpening Supplies lays out this progression clearly across stone types and brands.
One practical note: JIS (Japanese Industrial Standard) grit ratings and ANSI (American) ratings measure particle size differently. A JIS 1000 stone cuts noticeably finer than an ANSI 1000 stone. When you are comparing stones across origins, check which standard the manufacturer used. The label alone is not enough.
Abrasive material matters as much as grit number
Diamond abrasives are the hardest commercially available sharpening medium. They cut any steel, including high-vanadium alloys and ceramic blades. That cutting power is an advantage and a liability. A coarse diamond plate can reshape the geometry of a thin Japanese blade in three or four careless passes. Reserve aggressive diamond grits for repair work and use lighter pressure than you think you need.
Ceramic abrasives (alumina-based) are softer than diamond and cut more slowly. That slower cut rate is a feature, not a flaw. Ceramic excels at the refinement and finishing stages, and a ceramic honing rod is the correct tool for realigning an edge between full sharpenings on medium-hardness steels.
Natural waterstones, including Japanese nagura and Arkansas stones, cut at a variable rate that depends on the stone’s specific mineral composition. Experienced sharpeners prize them for tactile feedback and edge quality. That variability also means they require more technique to use consistently.
A working grit progression
For a genuinely dull kitchen knife, the TSPROF guide on what sharpening stone grit you need confirms a progression that aligns with the one we recommend: start at 400 grit to establish the bevel, move to 1000 grit to refine the scratch pattern, finish between 3000 and 6000 grit for a polished working edge. A leather strop loaded with chromium oxide compound adds a final micro-alignment pass that removes the last of the wire edge.
Pull-through and electric sharpeners fix both the grit sequence and the angle. You get whatever progression the manufacturer chose, with no ability to adjust either variable. Whetstones give you full control over both. That control matters most on steels above 60 HRC, where the wrong abrasive or an imprecise angle can cause micro-chipping that no amount of stropping will fix.
Sharpening angles by knife type: the 15 vs. 20 degree question explained
The sharpening angle is the bevel angle ground onto each side of the edge. Two numbers dominate the conversation: 15 degrees per side and 20 degrees per side. Those sound close. The practical difference is significant.
A 20-degree-per-side grind produces a 40-degree inclusive angle. That is the standard for Western and European chef knives, heavy cleavers, and any blade designed to handle lateral stress, board contact, and general-purpose cutting. The wider angle leaves more steel behind the apex, which is what gives those edges their durability under rough use.
A 15-degree-per-side grind produces a 30-degree inclusive angle. That is the standard for Japanese kitchen knives and other thin-ground blades built for precision slicing. The geometry is more acute, which means less resistance through soft foods and cleaner cuts on delicate proteins. That refinement comes with a trade-off: less metal behind the apex, which means less forgiveness.
Why steel hardness governs which angle works
This is where the metallurgy matters. A thin apex needs the steel beneath it to resist deformation under load. If the steel is soft, it deflects. The apex folds or chips rather than holding its geometry.
German and Western steels typically run 56 to 58 HRC. At that hardness, a 15-degree bevel would collapse quickly under normal kitchen use. The apex is simply too thin for the steel to sustain. Those knives need the 20-degree bevel because the wider geometry compensates for the lower hardness. Japanese steels, commonly hardened to 60 to 65 HRC, can hold the thinner 15-degree apex because the increased hardness resists the deformation that would destroy a softer steel at the same angle. This hardness-angle relationship is explained clearly at a technical level and is worth reading before you commit to any sharpening tool.
Single-bevel knives: a separate category entirely
Traditional Japanese knives such as the yanagiba and deba are single-bevel blades. They have a flat (often hollow-ground) back and a bevel on one face only, typically ground at 10 to 15 degrees. This geometry is not a variation on the double-bevel standard. It is a fundamentally different design. Single-bevel knives require freehand whetstone sharpening, full stop. No pull-through sharpener, no electric unit designed for double-bevel Western blades, can handle them correctly. Attempting it will destroy the geometry.
What fixed-angle sharpeners do to the wrong knife
Pull-through sharpeners and most electric models lock you into a preset angle. That preset is usually 20 degrees, occasionally somewhere between 15 and 20. If your knife was factory-ground at 15 degrees and you run it repeatedly through a 20-degree sharpener, the tool grinds a new, fatter bevel over the original profile. The knife does not get sharper in the intended sense. It gets reprofiled into a geometry the manufacturer never designed. Over months of use, the original edge geometry is gone. A detailed discussion on knife sharpening angles covers how that cumulative reprofiling accelerates metal removal and shortens blade life.
The practical rule is straightforward: know the bevel angle your knife was designed for before selecting a sharpener. If the sharpener cannot match that angle, it is the wrong tool for that knife, regardless of how convenient it is to use.
Best sharpener for home cooks with German-steel knives
Who this is for: You cook at home with a Western-style chef knife, likely made from a German-derived alloy such as X50CrMoV15, sitting in the 56 to 58 HRC range. You want a reliably sharp edge. You do not want to spend an hour on technique every few weeks.
Who should skip this section: If your knife is a premium Zwilling Pro running FC61 steel at 60 to 61 HRC, treat it closer to the Japanese-steel guidance. That harder alloy is less forgiving under mechanical stress.
Pull-through manual sharpeners
For this use case, a pull-through sharpener with ceramic or tungsten carbide slots is an acceptable starting point. The reason it works here is metallurgical: 56 to 58 HRC steel is soft enough that the mechanical stress of a fixed-angle carbide slot does not fracture the edge apex. The same tool on a 62 HRC Japanese blade causes micro-chipping. On a German knife, it produces a workable edge. Ceramic slots are gentler and better suited to finishing; carbide is more aggressive and removes metal faster. If micro-chipping appears on your edge after using a pull-through, the most likely cause is an angle mismatch between the slot geometry and your knife’s factory bevel. Under-$50 options cover this tier and are adequate for occasional, low-demand use.
Electric sharpeners with diamond abrasives
A quality electric sharpener with diamond-coated discs and a preset angle is a meaningful step up. Diamond abrasive removes metal consistently and the preset angle eliminates the guesswork that causes uneven secondary bevels over time. The critical requirement: confirm the preset angle matches your knife. German factory edges run 15 to 20 degrees per side. A sharpener preset for a narrower Japanese edge will progressively rework your bevel into a geometry the steel was not designed to hold at that hardness. Midrange electric sharpeners in the under-$100 band deliver results that justify the price for a household sharpening monthly.
Combination whetstone as the long-term standard
A 1000/6000 combination stone remains the highest long-term value in this category, even for home cooks who are not enthusiasts. The 1000-grit side removes metal and resets a damaged or dull edge. The 6000-grit side refines and polishes the bevel. The combined result is an edge quality no pull-through or electric sharpener matches, because you control the angle, the pressure, and the metal removal at every stroke. The learning curve is real: expect two or three sessions before your technique produces consistent results. Once it does, you will sharpen less often because the edge lasts longer. A quality combination stone in the midrange band is the investment to make if you plan to own good knives for years.
Honing between sharpenings
Use a smooth or fine-ridged honing rod after every few cooking sessions. On 56 to 58 HRC steel, a honing rod realigns the edge apex without removing metal. The edge folds over with use; the rod straightens it back. Done consistently, honing extends the interval between full sharpenings significantly. This is maintenance, not sharpening. The distinction matters and is covered in the sharpening vs. honing section below.
Best sharpener for home cooks with Japanese-steel knives
Who this is for: You own a gyuto, santoku, nakiri, or similar Japanese-style knife built from VG-10, SG2, HAP40, or a comparable high-hardness alloy sitting at 60 HRC or above. You want to maintain the knife’s original edge geometry, typically 15 degrees per side or less, without degrading the blade over time.
Who should skip this section: If your knives are Western-style, German-derived alloys in the 56 to 58 HRC range, the previous section covers your use case. The guidance below is specific to hard, thin-ground Japanese steel and does not apply equally to softer blades.
Carbide pull-through sharpeners: do not use them
Hard steel is hard because it resists deformation. That same property makes it brittle at the edge apex. When a carbide pull-through sharpener bites into a thin, hard blade, it applies lateral stress and tears at the steel rather than abrading it cleanly. The result is micro-chipping along the edge. The damage is often invisible after a single session. After a dozen sessions, the edge is compromised in ways no subsequent sharpening will fully correct. This is not a price-point issue. A premium carbide pull-through causes the same problem as a budget one. The mechanism itself is incompatible with this steel type.
Electric sharpeners: conditional use only
Electric sharpeners can work on Japanese blades, but only under one condition: the manufacturer must have designed the product specifically for Japanese geometry, with a 15-degree slot and fine diamond abrasives. A generic electric sharpener set to 20 degrees will grind a new bevel onto your blade each time you use it. Over repeated sharpenings, that compounds. The original geometry is gone and the knife performs below what it was designed to do. Before purchasing any electric sharpener for a Japanese knife, verify the angle specification in the product documentation, not the marketing copy.
Whetstones: the standard for 60-plus HRC
A whetstone progression is the authoritative method for any Japanese knife above 60 HRC. Start at 400-grit for edge repairs or significant reprofiling. Move to 1000-grit to establish the working edge. Finish at 3000 to 6000-grit for refinement and polish. The reason whetstones work where mechanical systems fall short is control. You set the angle, you manage the pressure, and you can feel the edge developing across the stone. For detailed guidance on selecting a whetstone for hard Japanese steel, this overview of Japanese knife sharpener options covers several entry-level stone formats worth reviewing. The trade-off is skill. Freehand technique on a hard, thin blade takes practice, and errors are less forgiving than they are on softer Western steel.
Guided-angle rod systems: the practical middle ground
For home cooks who own high-value Japanese knives but have not developed freehand whetstone technique, guided-angle rod systems are the strongest practical recommendation. They hold a consistent 15-degree angle mechanically, removing the variable that causes the most damage: an unsteady hand. The abrasive rods in these systems are fine enough for hard steel and do not apply the lateral tearing force that carbide creates. The trade-off versus whetstones is feedback. You get the angle control without the tactile information that tells an experienced sharpener how the edge is progressing.
Ceramic honing rod: the correct tool between sharpenings
A ceramic honing rod belongs beside every Japanese knife. The fine ceramic surface realigns the edge apex after each use without removing meaningful material and without applying the lateral stress that a ridged steel honing rod creates. Steel honing rods are designed for softer Western blades that roll rather than chip. On a 62-plus HRC Japanese blade, a steel rod is a liability. Use the ceramic rod regularly, sharpen infrequently, and the edge geometry you started with stays intact longer.
Sharpening EDC and pocket knives in the field
Field sharpening is where steel selection becomes a daily practical problem, not just a spec-sheet conversation.
Know your steel before you pack your sharpener
EDC blade steels span a wide hardness range, and the gap matters. Entry-level folder steels like 8Cr13MoV sit around 58 HRC. They are forgiving. Almost any abrasive, a ceramic rod, a pocket stone, a basic diamond paddle, will cut the steel and produce a working edge without much fuss. Premium powder-metallurgy steels are a different category entirely. CPM-S35VN, M390, and Maxamet are heat-treated into the 60 to 68 HRC range, and they are increasingly common in mainstream CPM-S35VN folders across major brands, not just high-end collector pieces. If you upgraded to one of these steels and kept using the same ceramic rod, you probably noticed it stopped working. There is a reason for that.
Why ceramics fail on high-vanadium steels
The vanadium carbides in steels like M390 and Maxamet are harder than the aluminum oxide abrasive in most standard ceramic field rods. When the ceramic meets those carbides, the abrasive glazes over. It skates across the surface, generates heat, and removes almost nothing useful. Diamond abrasives, rated 8 to 10 on the Mohs scale, are the only field-portable medium hard enough to cut those carbides reliably. This is not a marginal difference. On a high-vanadium steel, a ceramic rod is essentially decorative. A diamond tool is the correct choice.
The right field-portable formats
For a plain-edge EDC folder, compact diamond paddles and folding diamond rods are the most practical options. They are light, work dry with no water or oil required, and handle any steel regardless of hardness. A double-sided 400/600 grit diamond paddle in the under-$30 band covers the majority of field touch-up tasks. Lightweight guided-angle rod systems in the midrange band are worth the extra carry weight when edge geometry precision matters, such as for a thin-ground blade where rebuilding the bevel freehand carries real risk.
Serrated edges need a different approach entirely
A flat paddle or stone cannot contact the bevel inside a serration gullet. The geometry simply does not allow it. Sharpening serrations requires a tapered or round rod sized to match the diameter of the scallops on your specific blade. Ceramic or diamond construction depends on your steel, following the same logic outlined above. The practical good news is that serrations dull significantly more slowly than plain edges under typical EDC tasks. When serrations do finally need attention, a tapered rod is the correct tool, not a flat abrasive.
Who this is for, and who should skip it
This category of sharpener is built for daily carriers, outdoor workers, hunters, and anyone who needs a field-capable solution that fits a jacket pocket or a pack. If your blade lives primarily in the kitchen and you have bench space available, a proper whetstone setup will always outperform any compact field tool in terms of abrasive surface area, stability, and the quality of edge you can produce. Field sharpeners are the right answer when you cannot bring the bench to the blade.
Sharpening outdoor and hunting blades: field priorities
Hunting and outdoor blades operate in a different world than kitchen knives. The priority is not a mirror apex. The priority is a working edge, restored quickly, with whatever fits in a pack.
Most hunting and bushcraft fixed blades run steels in the 58 to 62 HRC range. Common examples include 1095 carbon steel, D2 tool steel, CPM-3V, and S30V stainless. These steels are selected for toughness and impact resistance, not for the kind of thin, hard edge geometry you grind onto a Japanese gyuto. That design choice shapes everything about how you sharpen them in the field.
The two-piece field kit
A coarse diamond paddle in the 200 to 400 grit range is the right starting point for a dull working edge. Diamond abrasive cuts fast, works dry or with water, and does not load up with metal filings the way softer stones do. Once you have the bevel reestablished, a medium ceramic rod in the 600 to 1000 grit equivalent range refines the edge to a finish that handles skinning, food prep, and rope cutting without complaint. That two-stage combination is compact, light, and effective. It is the lean solution most field users land on, and Work Sharp’s hunting-focused sharpening content reflects how widely that approach has been adopted in the hunting community.
D2 and high-chromium steels: why diamond matters more here
D2 presents a specific sharpening problem. Its high chromium content produces large, unevenly distributed carbides throughout the steel matrix. Ceramic abrasives struggle to cut through those carbides efficiently at the initial bevel-setting stage. Diamond abrasive does not. It cuts the carbide and the surrounding steel matrix without skating. Once the edge is established on D2, a ceramic rod handles touch-up maintenance well. The principle: use diamond to set the bevel, ceramic to maintain it between sessions. TSPROF’s hunting knife sharpening guidance covers this steel-to-abrasive matching logic for anyone working with harder, carbide-heavy alloys.
Convex grinds: why guided systems fail here
Convex grinds are common on bushcraft knives and dedicated choppers. The bevel curves outward rather than meeting in a flat plane. Guided-angle systems and pull-through sharpeners are engineered for flat or hollow bevels. Run a convex edge through either one repeatedly and you will progressively flatten and degrade the geometry you are trying to preserve. The correct approach is freehand sharpening on a flat stone, using a slight rocking motion at the heel of the stroke to follow the bevel’s curve. Finish on a leather strop. It takes practice, but it is the only method that respects the grind.
Skinning edge vs. camp working edge
The end use determines the right field kit. Hunters who need a true razor edge for caping or detail skinning should carry a whetstone progression, coarse through fine. It takes more pack space and more time, but the edge quality justifies both. For general backcountry camp tasks where a functional cutting edge is the goal, the diamond paddle and ceramic rod is all you need. Outdoor Life’s tested 2026 sharpener roundup reflects this same split between precision skinning tools and general-purpose field portables.
Who this is for: hunters, backcountry campers, bushcraft practitioners, and outdoor workers who maintain fixed-blade knives away from a bench setup.
Who should skip the field-only kit: home cooks who never leave the kitchen. A full bench setup with whetstones, a guided system, and a strop will always outperform a field kit for kitchen-grade edge refinement. There is no reason to compromise on that.
Rolling sharpeners explained: mechanics, strengths, and steel compatibility
Rolling sharpeners work on a principle that most home cooks have never encountered. A magnetic angle block grips the spine of the knife and holds it at a fixed bevel angle. A disc abrasive then rolls along the edge, moving parallel to it rather than scraping across it. That rolling motion is the key mechanical distinction. Pull-through sharpeners drag carbide or abrasive laterally across the bevel. Whetstones require you to maintain the angle freehand through each stroke. A rolling sharpener eliminates both of those variables simultaneously.
The angle-control advantage
The consistent angle is the real selling point, and it is legitimate. Home cooks who have struggled with whetstones often cite angle drift as the reason their edges never came out right. A rolling sharpener removes that problem by design. The disc cannot deviate from the preset angle as long as the magnetic block seats correctly against the spine. That is a genuine improvement over freehand technique for most people, and Serious Eats notes that the rolling format removes the guesswork that defeats most home cooks on whetstones. Consumer interest has followed: one YouTube comparison video in the rolling sharpener category exceeded 1.2 million views, yet detailed written guidance on the mechanics remains sparse.
Steel compatibility and disc material
This is where buyers need to slow down. The rolling motion does reduce lateral stress compared to carbide pull-through sharpeners, which matters for harder steels. But the disc material determines whether the sharpener actually works on your knife. Diamond-faced discs carry enough hardness differential to cut effectively across the full HRC range, including high-carbide alloys above 62 HRC. Standard corundum (aluminium oxide) discs lack that hardness advantage. On steels above 62 HRC, a corundum disc will skate rather than cut, producing a dull, rounded apex instead of a clean bevel. For knives in the 56 to 62 HRC range, both disc types are viable; diamond is faster and more consistent.
The fixed-angle constraint
HORL and most clones offer two settings: 15 degrees and 20 degrees per side. Those two angles cover the majority of Western and mainstream Japanese production knives. But the fixed-angle block is also the format’s principal limitation. Single-bevel Japanese knives (yanagiba, deba) are incompatible entirely. Knives ground at non-standard angles cannot be corrected. If you want to reprofile a bevel or change the geometry, a rolling sharpener cannot do that work.
Who this is for: Home cooks who own double-bevel knives in the 56 to 62 HRC range and want more consistency than a pull-through provides, without committing to whetstone technique. Specify a diamond disc when buying.
Who should skip it: Anyone sharpening hard Japanese steel above 62 HRC (unless buying the diamond disc version specifically), single-bevel knife owners, or anyone who needs to change bevel geometry. A whetstone remains the right tool for those cases.
Sharpening vs. honing: the distinction every knife owner needs to understand
These two words get used interchangeably in most kitchens. That is a mistake, and it costs knives years of useful life.
Sharpening removes metal. A whetstone, a sharpening rod, or a powered abrasive grinds steel away from both sides of the blade until the two bevels meet cleanly at a new apex. That fresh junction is your cutting edge. Sharpening is the right call when the apex has deformed past the point of recovery, whether through chipping, rolling, or gradual wear that leaves the knife genuinely blunt. It is a restorative process, and because it consumes steel, it should not happen more than necessary.
Honing realigns the edge without meaningful metal removal. The apex of any knife edge is extremely thin, thin enough that normal cutting pressure folds it sideways over time. The blade feels dull, but the steel is still there, just displaced. A honing rod pushes that folded apex back into alignment. The result feels like a freshly sharpened knife because, in functional terms, the edge is restored. No steel is ground away. The geometry is simply corrected.
Most home cooks need to hone far more often than they sharpen. A daily-use German-steel chef knife benefits from three to five light honing passes before each serious cooking session. Full sharpening, by contrast, may only be necessary two to four times per year. The exact frequency depends on how hard you use the knife, what you cut on, and how well you store the blade. End-grain wood boards are gentler on an apex than hard plastic or glass surfaces, which accelerate rollover and micro-chipping considerably.
The honing tool must match the steel. A grooved steel honing rod works well on Western knives in the 56 to 58 HRC range because those softer steels flex and realign under the rod’s ridges. Apply the same grooved rod to a Japanese knife at 62 HRC and you risk micro-chipping the apex rather than straightening it. Hard steels are more brittle; the lateral stress from ridged grooves is too aggressive. Use a smooth honing steel or a fine ceramic rod for anything at 60 HRC and above.
Stropping is a separate finishing step, not a synonym for honing. After whetstone sharpening, drawing the blade across leather (plain or loaded with a polishing compound) further refines and polishes the apex before first use. Think of it as the final step in a sequence: sharpen on stone, strop on leather, then hone regularly between sharpening sessions.
The practical schedule is simple. Hone before every significant use. Sharpen only when honing stops working. If three passes on a honing rod no longer bring the edge back, the apex needs metal removed, not realigned. Honing a genuinely dull knife is wasted effort. Sharpening a knife that only needed honing wastes steel and shortens the blade’s life.
Sharpener budget guide organized by use case
Match the budget to the knife, not to your ambition. Here is how that breaks down by use case.
Home cook, German-steel knives
An under-$50 manual pull-through paired with a smooth honing rod covers daily maintenance on 56 to 58 HRC German steel. The pull-through handles the occasional full sharpen; the smooth rod realigns the edge between sessions. That combination is enough for most home kitchens. If you want meaningfully better results, a midrange combination whetstone is the upgrade path. It requires technique investment, but the edge quality improves noticeably once you have the angle consistent.
Home cook, Japanese-steel knives
Do not use a pull-through on hard Japanese steel. Budget for a midrange whetstone set instead. A 1000/6000 combination stone is the standard starting point: 1000 grit for edge repair and sharpening, 6000 for finishing and refining. Pair it with a fine ceramic honing rod for between-session maintenance. If freehand sharpening feels like too much to take on, a guided-angle system in the midrange band is a practical alternative. It holds the bevel consistently while you build technique.
EDC and pocket knives, field maintenance
A compact diamond paddle in the under-$30 band handles most field sharpening tasks. For premium folder steels, specifically S35VN and M390, diamond is not optional. Those high-vanadium alloys resist ceramic abrasives effectively, so ceramic paddles produce little result. A pocket-sized diamond rod in the under-$50 band covers the full range of EDC sharpening needs without excess weight or bulk.
Outdoor and hunting, field maintenance
A coarse diamond paddle plus a medium ceramic finishing rod, combined, stays under $50 and handles field dressing and general outdoor use cleanly. For hunters who want a refined skinning edge, adding a 1000-grit whetstone to the kit fills that gap without significant added cost.
Enthusiast and collector, full capability
A whetstone progression across coarse, medium, and fine grits plus a leather strop is the standard recommendation at this level. Premium synthetic stones and Japanese natural waterstones sit in the premium band. They reward consistent technique with edge quality that lower-cost stones cannot match.
The universal rule
Do not overspend on a sharpener relative to the knife it will maintain. A premium guided system is wasted on a $30 utility blade. The reverse is equally true: using a mechanically wrong sharpener on a quality knife, regardless of how little it costs, causes real damage. Match the tool to the steel first. Budget second.
How Steel Snob evaluates knife sharpeners
Every sharpener we evaluate is judged, using manufacturer specifications, independent tests and owner reports, against the same four-category steel matrix before we publish a single recommendation. Those four categories are: soft Western alloys sitting in the 56 to 58 HRC range, hard Japanese steels from 60 to 64 HRC, high-carbide premium EDC steels from 60 to 66 HRC, and outdoor fixed-blade alloys in the 58 to 62 HRC range. Most published roundups test one chef knife on five sharpeners and call it done. That approach tells you almost nothing useful, because a carbide pull-through that works acceptably on a soft German blade will fracture the apex of a 63 HRC VG-10 gyuto on the first pass. Our criteria are built around that fact, not around convenience.
For edge quality, we look for independent tests that inspect the edge before and after sharpening under magnification, checking for micro-chipping along the apex, edge rollover, and bevel consistency from heel to tip, and that confirm practical sharpness with standardized paper-slice and tomato-slice tests.
Metal removal rate across multiple passes, as reported in independent tests, tells us whether a given tool is removing an appropriate amount of material for the steel it is touching, or grinding away metal faster than the application justifies. Angle consistency matters at every point along the blade length, because a sharpener that holds 15 degrees at the midpoint but drifts at the heel is not delivering the bevel it claims. Abrasive degradation over extended use, as owners report it, matters too, because diamond discs and ceramic slots lose cutting aggression over time in ways that affect results without any visible warning.
The Steel Snob editorial team sets the review criteria and signs off on all published recommendations. No manufacturer sees findings before publication. No sharpener earns a recommendation through a commercial relationship. Steel Snob takes no manufacturer samples and no payment for coverage.
Choosing the right sharpener: the decisions that matter
The most important question is not manual versus electric versus whetstone. It is whether the sharpener’s mechanism and abrasive are physically compatible with the steel in your specific knife. Format is secondary. Steel compatibility is primary.
Carbide pull-through sharpeners are acceptable for soft German-steel knives, typically 56 to 58 HRC, and a poor choice for anything above 60 HRC. Hard Japanese steels are brittle at the apex. Carbide scrapers do not refine that edge; they fracture it. Buying the wrong sharpener for a premium Japanese knife is not a minor inconvenience. It is the most common and expensive sharpening mistake home cooks make, and the damage is cumulative.
Know your knife’s intended bevel angle before committing to any fixed-angle sharpener. Japanese knives are typically ground at 15 degrees per side. Western knives run at 20 degrees. Grinding a 20-degree bevel onto a 15-degree edge changes the knife’s designed geometry permanently. Correcting it requires removing significant metal across the full bevel length.
Honing and sharpening are different interventions. Hone frequently, with the correct rod for your steel’s hardness. Sharpen only when honing no longer restores the edge. Treating them as the same task accelerates wear unnecessarily.
Buy the sharpener that matches your knife’s steel and your actual use case. If the metallurgy covered in this guide moved you from one category to another, that is exactly what it was written to do.
Conclusion
Choosing the right knife sharpener comes down to knowing your blade. The steel hardness, edge angle, and how often you cook all play a role in finding your perfect match. A whetstone rewards patience and gives you precision; a quality electric sharpener delivers consistency with less effort; and a honing rod keeps your edge performing between full sharpenings.
The wrong tool wastes time and wears down your knives unnecessarily. The right one transforms how your blades feel and perform every single day.
Now that you understand the differences, take a closer look at the knives in your kitchen. Check the steel type, consider how you cook, and choose the sharpener that fits your real-world needs. A sharp knife is safer, faster, and simply more enjoyable to use. Start sharpening smarter, and you will never go back to struggling with a dull blade again.