
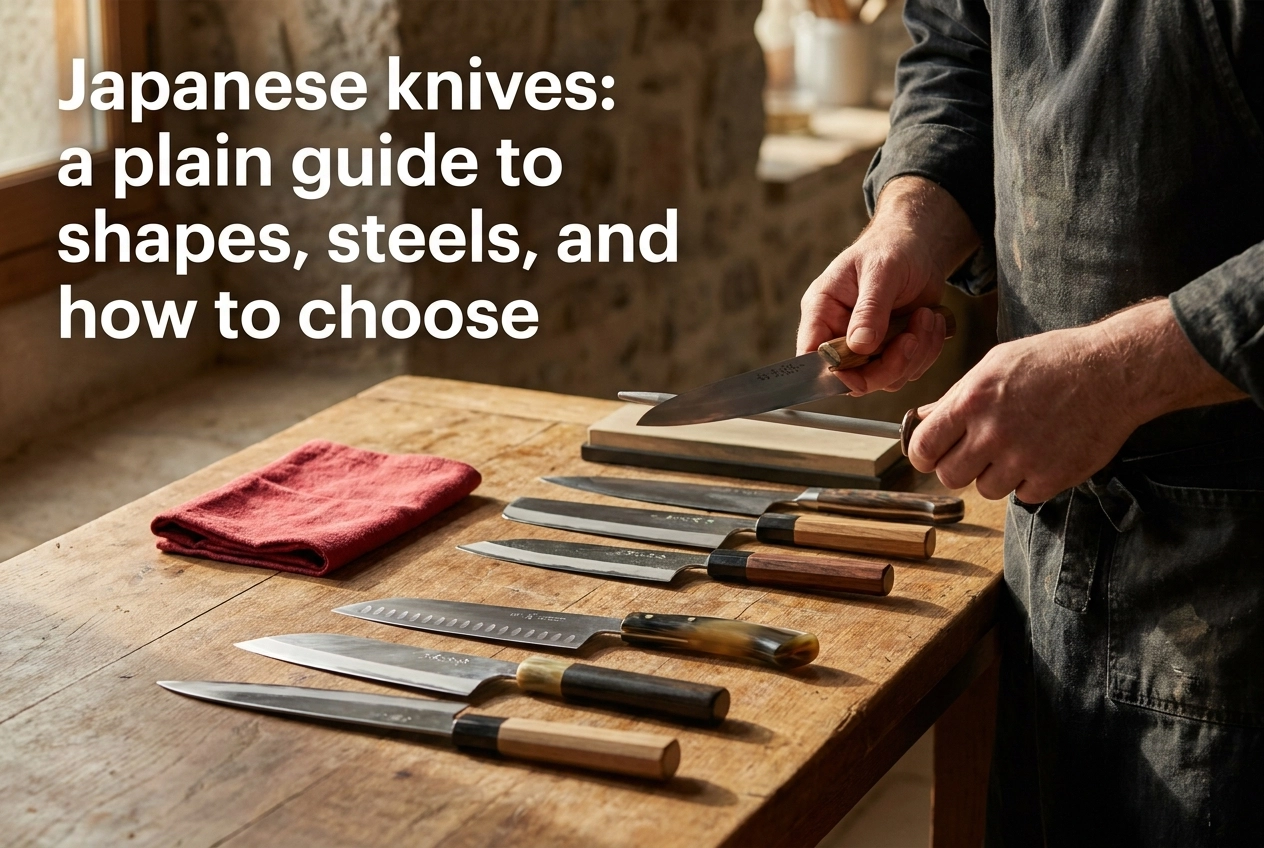
Walk into any serious kitchen and you will likely spot at least one Japanese knife on the cutting board. These blades have earned a devoted following among home cooks and professional chefs alike, and for good reason. They are sharper, lighter, and more precise than most of their Western counterparts.
But if you have ever tried shopping for Japanese knives, you know how quickly things get confusing. Gyuto, santoku, nakiri, VG-10, white steel, blue steel; the terminology alone can feel like a foreign language. Without a clear guide, it is easy to overspend on the wrong blade or miss the one that would actually transform your cooking.
This post cuts through the noise. You will learn the most common Japanese knife shapes and what each one is designed to do, get a plain-English breakdown of the steel types you will encounter, and walk away with a practical framework for choosing the right knife based on your skill level and budget. No fluff, no jargon overload. Just the information you need to make a confident, well-informed decision.
The short answer: start here
Most home cooks should start with a santoku. The blade runs 165 to 180mm, handles roughly 60 percent vegetable work and 40 percent boneless protein, and comes in solid stainless steel at a price that does not require justification. Its edge geometry is forgiving, the flat profile rewards a straightforward push-cut, and good options exist at every sensible budget. If you cook dinner most nights and own nothing better than a supermarket block set, a santoku is the answer. A well-specced santoku guide confirms this is Japan’s most popular home kitchen knife, and the domestic sales data backs it up.
If you already own a Western chef knife and your default motion is a rocking push-cut, the 240mm gyuto is the more natural entry point. It is the direct Japanese equivalent of what you already use, just harder, thinner behind the edge, and ground at a more acute angle. The upgrade path is intuitive rather than a technique rebuild.
Follow this buying order to avoid paralysis: shape first, then steel family, then handle style, then blade length, then budget. That sequence maps closely to how serious retailers structure their own buyer journeys, and every section of this guide follows it.
Finally, do not buy a knife set. One well-chosen knife outperforms six mediocre ones on every practical measure. The full reasoning is in the budget section below.
Why Japanese knives feel overwhelming (and how to fix that)
A first-time buyer in 2026 faces at least six distinct knife shapes, four steel families, two handle styles, five common blade lengths, and a tenfold price range, all at the same time. That is not a knowledge gap. That is a structural problem with how the category presents itself.
Retailer pages are built for catalog browsing, not guided selection. A single site might surface a gyuto, kiritsuke, santoku, nakiri, sujihiki, and petty knife on the same screen, alongside stainless and carbon steel options, wa and yo handles, and finishes from kurouchi to hammered tsuchime. Buying guides covering ten knowledge areas at once are common, and they are genuinely useful references. But they optimize for completeness, not for helping a specific buyer make a specific decision.
More information is not the fix. A decision tree is.
The variables have a natural sequence. Shape comes first because it determines what the knife can physically do. A nakiri is built for vegetables. A sujihiki is built for slicing boneless protein in long strokes. Getting shape wrong means the knife fights you at the cutting board regardless of how good the steel is. Steel comes second because it determines maintenance commitment and edge behavior. Handle style and blade length are refinements on a shape already chosen. Budget sets the ceiling on steel quality and fit and finish, not the other way around.
This guide works through each variable in that order. If you already have your shape answer from the section above, keep reading. If you are not sure yet, start with the basics on buying a Japanese knife and come back to go deeper on steel and handle decisions.
Knife shapes: what each one actually does
Eight shapes cover the full Japanese knife family. Most home cooks need exactly one of them. Here is what each one does and who should actually buy it.
1. Santoku (165-180mm)
The santoku is the most popular Japanese kitchen knife in the world, and it earns that position. The name translates to “three virtues,” referring to fish, meat, and vegetables. In practice, the use-case split runs closer to 60 percent vegetables and 40 percent boneless protein. The blade has a sheepsfoot tip, a relatively flat edge profile, and a double-bevel grind. That combination makes it forgiving to learn on and easy to sharpen. Push-cutting is the natural motion here. The shorter length keeps the knife light and maneuverable, which matters during long prep sessions.
Who should skip it: cooks who regularly break down large proteins, or anyone who already owns a Western chef knife and wants something meaningfully different. The santoku and a 8-inch Western chef knife cover similar ground. Buying both first is redundant.
2. Gyuto (180-270mm, 240mm most common)
The gyuto is the Japanese equivalent of a Western chef knife. The name translates literally to “beef sword,” which tells you everything about its origins. Japan introduced the shape during the Meiji period specifically because traditional Japanese knives were not designed for beef. The blade is longer and slightly thinner behind the edge than a santoku, with a pointed tip and a gentle curve that supports both rocking cuts and long forward push-cuts. It handles proteins and vegetables with equal confidence. The 240mm length is the most common choice and the one we recommend as a first purchase for cooks who want a single knife covering roughly 80 percent of kitchen tasks.
Who should skip it: home cooks who primarily prep vegetables and want a shorter, lighter knife. A santoku fits that profile better.
3. Nakiri (~165mm, flat profile)
The nakiri is a pure vegetable knife. Approximately 90 percent of its work involves plant material. The distinguishing feature is the flat edge profile: the entire edge contacts the cutting board on every stroke, which eliminates the forward rocking motion entirely. That geometry is ideal for brunoise, chiffonade, and any cut requiring consistent contact with the board. The double-bevel grind makes it accessible to beginners. It is a specialist tool, not a workhorse.
Who should skip it: anyone who needs one knife to handle protein as well as vegetables. The nakiri is not designed for boneless chicken, fish fillets, or anything that requires a pointed tip.
4. Petty (120-180mm)
The petty fills the same role as a Western paring or utility knife. It handles in-hand work, trimming, peeling, and small prep tasks that a full-length blade cannot do precisely. A 150mm petty paired with a 210mm gyuto is a standard two-knife home kit recommendation for good reason. It is a complement to a primary knife, not a replacement for one.
Who should skip it: buyers looking for a first and only knife. The petty is genuinely useful once you have a primary blade. On its own, it leaves too much work uncovered.
5. Sujihiki (240-300mm)
The sujihiki is a long, narrow double-bevel slicing knife. The blade is much shorter in height than a gyuto, which reduces drag through proteins on each stroke. It is the right tool for portioning roasts, breaking down salmon, and carving poultry at the table. The length and narrow profile let the blade glide through muscle fiber rather than wedging through it.
Who should skip it: home cooks who rarely slice large cuts. The sujihiki has a narrow use case and does not replace a gyuto. Buy it second, not first.
6. Kiritsuke (210-270mm)
The kiritsuke requires a brief clarification, because retail labeling is inconsistent. The traditional kiritsuke is a single-bevel knife associated with senior professional cooks in Japan. It combines elements of the gyuto and the yanagiba into a hybrid profile with a distinctive clipped tip. Modern versions labeled “kiritsuke-gyuto” are double-bevel and are functionally a gyuto with that same clipped tip geometry. These two tools are different knives aimed at different users, and they are frequently conflated in product listings.
Either version is unforgiving for beginners. The tip geometry on a kiritsuke demands precise knife control that takes time to develop. This shape rewards existing skill; it does not build it.
Who should skip it: anyone who is not already comfortable with a gyuto. Start with the gyuto and return to the kiritsuke later if the profile appeals to you.
7. Yanagiba and sashimi knives (270-360mm)
The yanagiba is a long, single-bevel blade designed for one task: slicing raw fish in a single pulling stroke. The single-bevel geometry creates a clean, low-resistance path through fish flesh that a double-bevel blade cannot replicate. That precision is why professional sushi chefs use them. The trade-off is maintenance. Single-bevel sharpening is a distinct skill set involving different stone angles and techniques compared to double-bevel work. Left-handed cooks should also note that traditional single-bevel knives are ground for right-hand use; dedicated left-handed versions exist but need to be sourced specifically.
Who should skip it: home cooks who are not regularly preparing sashimi or sushi. The yanagiba is a dedicated tool that requires dedicated upkeep. It is not a general slicer.
8. Deba (165-210mm)
The deba is the heaviest knife in the traditional Japanese kitchen. It is single-bevel, with a thick spine and an asymmetric grind built for breaking down whole fish, including bones. The geometry concentrates force on the edge and spine, which is what you need when splitting a fish carcass. It is not a general-purpose knife by any measure.
Who should skip it: anyone who does not regularly fabricate whole fish. Using a deba for vegetable prep or boneless protein work is genuinely the wrong tool for the job. The weight and grind angle work against you outside of its intended application.
For a broader look at how these shapes fit into practical kitchen setups, the complete guide to Japanese knives covers use categories in useful detail.
Steel families: what the names mean and what they cost you in the kitchen
Four steel families define the Japanese knife market. Stainless, high-carbon, powdered/PM, and san-mai clad construction each make a different set of promises about edge retention, corrosion resistance, and how much daily discipline they demand from you. Getting the metallurgy straight before you buy saves you from owning a knife you will either neglect or resent.
Stainless steels: the low-maintenance starting point
VG-10 is the steel you will see most often in entry-to-mid Japanese knives. It carries roughly 1 percent carbon and around 15 percent chromium. That chromium content is what puts it firmly in the low-maintenance category: it resists surface oxidation well enough that leaving it on a drying rack overnight will not hurt it. Typical hardness sits at HRC 60 to 62. At that range you get solid edge retention and a blade that sharpens easily on a 1000-grit whetstone. It will not hold an edge quite as long as harder steels, but it will also not chip when you hit a seed or a slightly frozen corner of food. For a first Japanese knife, VG-10 is a rational, forgiving choice.
AUS-10 is a close stainless relative. It runs slightly less vanadium than VG-10, comparable chromium, and a similar HRC range of 59 to 61. It performs as a capable all-rounder and appears frequently in midrange knives as a cost-effective alternative to VG-10. The honest answer on the VG-10 versus AUS-10 question: in a home kitchen, cutting the same vegetables and proteins at the same frequency, the practical difference is small. Neither will embarrass you.
SG2, also sold as R2, is a powdered stainless steel that steps meaningfully above both. The powder metallurgy process creates a finer, more uniform distribution of carbide particles throughout the steel matrix. In practical terms, that uniformity means the edge is more consistent along its full length and holds that consistency longer. Typical HRC is 62 to 64. The trade-off is real: the edge is marginally more brittle than VG-10 at the same geometry, sharpening requires a finer stone (a 2000-grit minimum, finishing on something higher), and your angle discipline at the whetstone matters more. SG2 is worth the price premium only if you are already sharpening regularly and doing it correctly. If you are not there yet, start with VG-10 and upgrade later.
High-carbon steels: the sharpest edge, the highest upkeep
Shirogami, or White Steel, is about as pure as knife steel gets. There are almost no alloying elements beyond carbon. White Steel #1 runs carbon at 1.25 to 1.35 percent and reaches HRC 64 to 67 with the right heat treatment from a skilled maker. White Steel #2 drops the carbon slightly and comes in at HRC 62 to 65; it is a touch tougher and the most widely used carbon steel in the category. Both grades take a genuinely fine edge and sharpen with a responsiveness that stainless steels cannot match.
The cost is corrosion resistance, which is essentially zero. White Steel patinas quickly in contact with acidic foods: onions, citrus, tomatoes. A patina is not damage. It is a thin protective oxide layer, and a well-developed patina actually helps slow further oxidation. What will damage the blade is leaving it wet. Surface rust can appear within hours on an undried White Steel knife. The practical question is not whether you like the idea of carbon steel. It is whether you will consistently dry the blade within a few minutes of use. If you cook infrequently or share a kitchen where drying habits vary, start with stainless.
Aogami, or Blue Steel, is White Steel with chromium and tungsten added. Those additions improve wear resistance and toughness without meaningfully improving corrosion resistance. Blue Steel #2 (HRC 63 to 66) is the most popular variant and offers a strong balance of sharpness and durability for high-volume kitchen work. Aogami Super adds molybdenum and vanadium to that base, pushing HRC to 65 to 68 depending on the maker’s heat treatment. It holds an edge for a long time and sharpens to a very fine apex. It also chips more readily than lower-hardness steels on hard foods or, critically, on glass and ceramic cutting boards. Never use a high-carbon Japanese knife on a glass board. Maintenance requirements for all Aogami grades match Shirogami: dry immediately, apply a light coat of camellia oil or food-safe mineral oil if you are storing the knife for more than a few days.
Powdered/PM steels at the premium end
ZDP-189 and HAP-40 sit at the top of the hardness range. ZDP-189 can reach HRC 67 to 68 with appropriate heat treatment, and its carbon content runs around 3 percent, which is extremely high. Edge retention is exceptional. Brittleness is also real: the steel requires a sharpening technique focused on preserving apex geometry rather than aggressively removing material. HAP-40 is slightly tougher at comparable hardness because of cobalt and molybdenum in its composition. Both are skilled-user steels. Neither is the right first Japanese knife. If the question is whether to jump straight to ZDP-189 to get “the best,” the answer is no. Buy a VG-10 or Blue #2 knife, develop consistent sharpening habits, then consider the upgrade.
San-mai (clad) construction: a practical hybrid
San-mai means “three layers.” A hard core steel, often a reactive carbon steel or a high-end stainless, is sandwiched between softer stainless cladding on each flat face. The cutting edge is the exposed core steel; the cladding handles the sides. The result is a blade that can use a very hard, potentially reactive core while reducing the daily maintenance burden: only the edge itself needs the careful treatment that the core steel demands. When you see a knife listing that describes a “Blue Super core with stainless cladding,” that is san-mai construction. It is not a compromise; it is a deliberate engineering decision that makes high-performance core steels accessible to more users.
The damascus red flag
Damascus patterning is marketed aggressively as a signal of quality. It is not. A layered steel construction is a legitimate forging technique when the core steel is named, the layer count is meaningful, and the metallurgy is disclosed. When a knife is listed simply as “damascus steel” with no named core alloy, the pattern is cosmetic and the underlying steel is unknown. Decorative laminate over an unspecified base steel is not a premium product; it is a marketing presentation. Before buying any knife promoted primarily on its damascus appearance, ask one question: what is the core steel? If the retailer or product listing cannot answer that clearly, move on. A credible listing will name the steel. For a useful reference on how Japanese knife steels compare across the stainless and carbon categories, cross-referencing a steel guide with any purchase you are considering is worth a few minutes of your time.
The rule across all four families holds: no steel is objectively best. The right steel is the one that matches your sharpening skill, your kitchen habits, and your tolerance for maintenance. Start where those habits are honest, not where your ambitions are.
The HRC hardness ladder: what the numbers mean in your kitchen
HRC stands for Rockwell C scale. It measures how resistant a steel is to permanent indentation after heat treatment. In kitchen knife terms, a higher number means the steel can hold a finer edge angle and stay sharp longer between sessions. The trade-off is brittleness. Harder steels chip more readily under lateral stress or impact. The relationship is not “harder equals better.” It is “harder equals different priorities.”
The four bands you will actually encounter
Western production knives typically land at HRC 54 to 58. The steel is tough, flexible, and forgiving of steel honing rods and hard cutting surfaces, but edges roll faster and need more frequent touch-ups. Entry-level Japanese stainless knives, including VG-10 and AUS-10, run HRC 59 to 61. That is a meaningful step up in edge retention without a dramatic increase in brittleness. Mid-to-premium stainless and lower-carbon steels sit at HRC 62 to 64, where finer edge angles become achievable and sharpening starts to demand more care. High-carbon and powdered-metallurgy steels such as ZDP-189 and HAP40 push HRC 64 to 68. At that level, edge retention is exceptional, but the maintenance rules tighten considerably. For a deeper look at how steel hardness affects real kitchen performance, the Rockwell scale article at Kotai Kitchen covers the core mechanics clearly.
What the numbers demand from you
Above HRC 63, retire the steel honing rod. A ceramic rod or fine whetstone is the correct maintenance tool at that hardness. Above HRC 65, aggressive lateral force, such as scraping a board-full of chopped onion with the blade flat, risks microchipping at the apex. Glass and ceramic cutting boards are incompatible with any Japanese knife regardless of HRC. That rule applies at HRC 59 just as firmly as at HRC 67.
Higher HRC also stretches the interval between full sharpening sessions. A VG-10 knife at HRC 61 is forgiving of imperfect technique and works well with mid-range whetstones. A ZDP-189 blade at HRC 67 needs diamond abrasives or very fine ceramic stones. Coarser grits can damage the apex or create a wire edge that is difficult to remove cleanly.
One caveat worth noting: manufacturer-stated HRC figures often vary by one to two points from independent measurements. Treat published numbers as a reliable guide to the band, not a guaranteed precise value.
The sweet spot for home cooks
The HRC 60 to 63 range is the right target for most home cooks. It delivers noticeably better edge retention than a Western knife, supports finer cutting geometry, and does not impose specialist sharpening requirements or a strict soft-board regime. It is also the band where the widest selection of well-made knives lives at midrange prices. For most buyers, there is no practical reason to push beyond HRC 63 until sharpening skills and cutting surface choices are already dialed in.
Handle styles: wa vs. yo
Two construction philosophies define Japanese knife handles, and neither one is objectively better.
Wa handles use a hidden partial tang pressed into a hollow wood or composite sleeve. The shape is typically octagonal, D-shaped, or oval. Because the handle material is lighter wood, often magnolia or oak with a buffalo-horn ferrule, the overall weight sits between 80 and 130 grams. That lighter rear end shifts the balance point forward, toward the blade. Cooks who use a pinch grip, fingers wrapped around the blade spine rather than the handle, often find this forward balance more intuitive for precise tip work and pull cuts. One practical note for left-handed cooks: D-shaped wa handles are right-hand biased by default. Left-handed versions exist but must be specified at purchase.
Yo handles follow the full-tang, riveted construction common on European and American knives. The tang runs the full length, sandwiched between two scales fixed with three to five rivets. Handle weight runs 150 to 250 grams. That extra mass shifts the balance point rearward, toward the palm, which suits a rocking cut motion and heavier prep work. Materials like pakka wood, G-10, and Micarta are sealed and inherently water-resistant.
For most home cooks, the performance gap between a well-made wa and a well-made yo version of the same blade is small. What matters more is handle material. A stabilized wood or synthetic wa handle resists moisture well. A raw magnolia wa handle needs to be wiped dry promptly after each use and treated occasionally with camellia oil. Neither style belongs in a dishwasher. Heat, detergent, and prolonged moisture exposure damage both the handle and the blade regardless of construction. Sharp Edge Shop covers the full breakdown of handle materials if you want to go deeper on construction differences.
Handle choice is ultimately a preference decision. If you can visit a kitchen store, hold both styles before committing. If you are buying online, start with the style that already feels familiar and reassess once you have real cutting time logged.
How to spot a misrepresented Japanese knife
A meaningful number of knives sold in the US as “Japanese knives” are not made in Japan. Some are manufactured in China or elsewhere, then marketed under Japanese-sounding brand names, styled with Japanese aesthetic cues, and described using Japanese knife terminology. The deception is in the marketing layer, not in the manufacturing quality of those other countries. The problem has existed for years, but buyer sophistication has grown enough that it is now a live topic in enthusiast communities, with dedicated video content accumulating hundreds of thousands of views from people trying to sort legitimate product from imitation.
What “made in Japan” should actually mean
A genuinely Japanese knife had its blade forged, ground, and heat-treated in Japan. That is the full manufacturing process, not just the final polish or handle fitting. Japanese Industrial Standards (JIS) govern domestic production, setting quality benchmarks that apply to knives made within Japan. The country of origin should appear on the blade itself, on the tang, or at minimum on the packaging. If origin labeling is absent from the knife entirely and only appears in fine print on a cardboard sleeve, that is worth investigating further. Established makers stamp or engrave their brand and origin directly onto the steel. If the knife you are considering does not do this, ask why.
Steel name vagueness is a direct red flag
Reputable manufacturers name the core steel because that specification is part of the value proposition. VG-10, Aogami Super, SG2, AUS-10: these are named alloys with documented properties. When a listing says “67-layer damascus” or “Japanese high-carbon steel” without identifying the core alloy, you have no usable information about what you are buying. Damascus patterning describes the surface appearance of a clad construction; it tells you nothing about the steel doing the cutting work at the core. Decorative laminate over an unnamed alloy is one of the most common ways misrepresented knives pass casual inspection. If the steel is not named, the claim is incomplete.
How to vet a US retailer before you buy
Buy from a retailer who can answer three direct questions: what is the core steel, where was this knife made, and who is the maker or blacksmith. Specialist knife retailers who stock established Japanese makers and organise their inventory by maker and steel type provide a structurally different information environment than general marketplace listings. If the product page cannot supply those three answers independently of the brand’s own marketing copy, treat that as a gap in the product claim, not an oversight.
Price signals, and where they break down
Genuine entry-level Japanese knives from established makers start in the entry budget band, so legitimate product is not out of reach. Unusually low prices for claimed premium steels such as SG2 or ZDP-189 are a reliable warning sign. Those steels carry real production costs; a deep discount on a claimed SG2 knife almost always means the steel specification, the origin claim, or both are not accurate. That said, price alone is not a reliable verification tool. Some misrepresented knives are priced at mid-market levels specifically to appear credible. Treat price as one input, not as a final answer.
Budget tiers: what actually changes as you spend more
Entry tier (under $100)
This is where most first Japanese knives should live. Established makers in this band offer VG-10 or AUS-10 steel with solid heat treatment, a factory edge you can use immediately, and a handle built to last years with basic care. The steel is honest, the geometry is functional, and you are not paying for a name above the knife.
Tojiro DP is the reference point at this tier. The steel specification is consistent across production runs, the construction is straightforward, and there is no marketing premium folded into the price. It cuts well out of the box, sharpens predictably on a whetstone, and holds up in daily home kitchen use. For a first Japanese knife, nothing in this band gives you more per dollar. MAC knives sit at the upper edge of the entry range, and Misono UX10 sits in low midrange territory. Both are worth the step up if your budget allows, but neither is necessary for a first purchase.
Midrange ($100 to $300)
Steel quality increases meaningfully here. SG2 (also called R2), Aogami Super, and higher-quality san-mai constructions appear in this band. Those steels hold a finer edge angle for longer and respond better to skilled sharpening. Fit and finish improve in ways you can feel: the grind geometry is more refined, the choil is cleaner, and handle materials step up noticeably. These gains are real and tactile.
The gating factor is sharpening skill. A midrange knife in the hands of someone who sharpens consistently will perform better than an entry knife in the same hands. A midrange knife in the hands of someone who never touches a stone will degrade to an entry knife’s performance within a few months. If you already own an entry knife and have built a sharpening habit, a midrange upgrade is meaningful. If you have not yet developed that habit, start at entry and reinvest when the skill is there.
Premium (above $300)
This tier covers hand-forged knives from named craftspeople, PM steels like ZDP-189 and HAP-40, and bespoke handle materials. The performance gains are real: longer edge retention, more refined geometry, and a level of fit and finish that reflects workshop-scale production rather than factory lines. But the improvement per dollar becomes increasingly marginal for home kitchen use. These knives reward skilled sharpening and careful maintenance. They do not perform magic tricks.
A premium knife put to use by someone without a sharpening practice will not outperform a well-maintained entry knife. The ceiling is higher. Reaching that ceiling takes work.
What does not change across tiers
Shape function is constant. A santoku at any price point is still a santoku. It does the same job, follows the same motion, and handles the same ingredients. What changes across tiers is how long the edge holds between sharpenings, how refined the geometry is behind the edge, and how good the handle feels over an extended prep session. Those distinctions matter. They do not justify a premium purchase for every cook.
The knife set fallacy
A block set priced at $300 spread across eight pieces gives you perhaps two knives you will reach for and six that will occupy the block unused. A single well-chosen santoku or gyuto from an established maker in the midrange is more useful than any equivalent-cost block set. The math is straightforward: one knife with excellent steel and honest construction outperforms eight knives with divided budget and compromised specifications.
Start with one knife. Learn its geometry, its maintenance needs, and its limits in your kitchen. Add a second shape only when a genuine use case demands it. That approach builds skill and saves money. The block set approach does neither. For a practical overview of what Japanese knives cost at each level, this breakdown of Japanese knife prices illustrates the range clearly, and this comparison of Japanese chef knives from most to least expensive gives useful context on what the tiers look like in practice.
Blade finishes: functional differences vs. aesthetics
Finish is the first thing you see and the last thing that should drive your decision. Here is what each common finish actually does.
Kurouchi is the dark, oxidized layer left on the blade after forging. The smith skips the polishing step on the flat, leaving forge scale intact. That surface provides a modest degree of corrosion resistance on the upper flat and has some food-release benefit early on. The problem is that it wears. Normal kitchen use strips the scale from contact zones within a few months, and what remains is primarily a visual characteristic. A kurouchi finish is a legitimate signal of artisanal production. It is not a durable functional advantage.
Kasumi is a contrast finish: the flat of the blade is polished to a soft haze, and the edge bevel receives a mirror polish. It is traditional on single-bevel knives such as the yanagiba and deba, and it signals hand craftsmanship. There is no documented functional performance difference between a kasumi finish and a uniform satin finish on a double-bevel kitchen knife. The contrast is the point. It looks precise and considered because it is, but it does not cut differently.
Tsuchime (pronounced tsoo-chee-may) is the hammered finish you see on many midrange and premium stainless knives. The dimples, formed by hand or machine after forging, create small air pockets between the blade face and food. That reduces suction and drag. The effect is modest but real, particularly on sticky, high-moisture foods: cucumber, potato, soft cheese. Among the four finishes covered here, tsuchime has the most defensible functional claim. For a thorough breakdown of how these finishes are produced, this beginner’s guide to Japanese knife finishes covers the production differences clearly.
Nashiji, meaning pear-skin, is a matte textured surface achieved through acid etching or mechanical finishing. It offers similar food-release properties to tsuchime in theory, but the shallower surface texture makes the effect less pronounced. Nashiji hides scratches and fingerprints well and presents a clean, premium look at accessible price points. In practice, treat it as aesthetic.
The honest summary: finish type should not drive a buying decision at entry or midrange price points. Steel specification, heat treatment, and grind geometry carry far more weight on actual cutting performance than any surface treatment. If you are comparing two knives with identical steel specs and equivalent construction, a tsuchime finish is a minor functional plus worth noting. If finish is the deciding variable over steel spec and maker reputation, you are responding to aesthetics, which is a valid preference, but call it what it is.
Sharpening and maintenance: the short version
Japanese knives are ground at a shallower angle than Western knives. A typical double-bevel Japanese knife comes from the factory at 15 degrees per side. Most European-style knives sit at 20 to 22 degrees per side. That difference is not cosmetic. A thinner apex slices with less resistance, which is why a well-maintained Japanese knife feels so different in the hand. The trade-off is that the same thin apex is more vulnerable to poor sharpening technique.
Pull-through sharpeners are the most common way beginners damage Japanese knives. The fixed carbide or ceramic slots are set at a Western angle. Running a Japanese knife through them removes metal at the wrong geometry and rounds the apex into a shape the knife was never designed to carry. Avoid them entirely.
The whetstone is the right tool
Whetstone sharpening preserves the geometry the knife was built around. The grit progression is straightforward. A 400-grit stone handles a chipped or heavily neglected edge, removing enough metal to reset the bevel. A 1000-grit stone is the workhorse for regular maintenance. A stone in the 3000 to 6000 grit range refines and polishes the apex after the primary work is done.
Single-bevel knives (yanagiba, deba) require a different approach. One face is flat, ground at zero degrees. The other carries the full bevel. When sharpening, the flat face stays flush to the stone. Only the bevel side is raised and worked. This is a distinct skill from double-bevel sharpening, and beginners should watch a dedicated single-bevel sharpening tutorial before attempting it. For a full breakdown of technique by stone grit and knife type, this guide to sharpening Japanese knives covers the process in detail.
Carbon steel vs. stainless: different demands
Carbon steel knives (Shirogami, Aogami) are easier to bring to a sharp edge on a whetstone. Their carbide structure is finer and more uniform than stainless, so the stone bites into the steel cleanly and quickly. The cost is reactivity. Dry the blade immediately after every use. Oil it before any extended storage. Exposure to acid or moisture will produce rust, not just patina.
Stainless knives are more forgiving day to day. You have more time between the cut and the dry. The trade-off is that reaching the same apex refinement on a whetstone requires more passes. Neither steel is harder to maintain than the other overall; the demands are just different in kind.
Honing rods: use the right one or skip it
For knives in the HRC 60 to 63 range, a smooth ceramic rod is appropriate for regular honing. Do not use a grooved steel rod on any Japanese knife, regardless of hardness. The ridges are too aggressive and can chip the apex rather than realign it.
Above HRC 63, skip the rod entirely. At that hardness level, the apex is more likely to fracture than to fold. Honing a fractured apex does nothing useful. The correct approach is a light pass on a fine-grit stone to remove the damaged metal and rebuild the edge cleanly.
The goal of honing is realignment, not metal removal. Keep that distinction clear and you will avoid most common maintenance mistakes. For a complete protocol matched to each steel type and HRC range, see the Steel Snob sharpening and maintenance guides.
Quick reference: matching shape to use case and steel family
Use this table as a decision shortcut. Pick your use case on the left, then follow the row.
| Use case | Shape | Steel | Bevel | Budget |
|---|---|---|---|---|
| First knife, mostly vegetables and light protein | Santoku 165–180mm | VG-10 or AUS-10 | Double | Entry to midrange |
| First knife, mixed protein and veg, Western knife background | Gyuto 240mm | VG-10 or SG2 | Double | Entry to midrange |
| Dedicated vegetable prep as a second knife | Nakiri | Stainless or Aogami Blue | Double | Midrange |
| Utility and small prep tasks | Petty 150mm | Any stainless | Double | Entry to midrange |
| Large protein slicing, experienced cook | Sujihiki 270mm | SG2 or higher | Double | Midrange to premium |
| Do not start here | Yanagiba, deba, kiritsuke | Various | Single-bevel or specialist geometry | Any |
A few notes that the table cannot carry on its own.
The santoku is the right starting point for most readers. VG-10 and AUS-10 are both forgiving stainless steels that need no reactive maintenance and sharpen readily on a whetstone. Handle style is personal preference at this level. Stainless steel families and their kitchen implications are covered in the steel guide linked here if you want the alloy detail behind those names.
The gyuto makes sense if you already cook on a Western chef’s knife and want to stay close to a familiar rocking cut. The 240mm length is the most versatile size. A Yo handle reduces adjustment time because the grip geometry is similar to what you already know. SG2 is a step up in hardness and edge retention from VG-10, but it costs more and is slightly less forgiving to sharpen. Start with VG-10 unless you are confident on a whetstone.
The nakiri is a legitimate midrange purchase, but only if vegetables dominate your prep. It does one thing well. If you are peeling and slicing two carrots and half an onion on a weeknight, your santoku or gyuto already handles that. Buy a nakiri when vegetable prep volume is high enough that a dedicated flat-profile push-cutter genuinely saves you time and effort. Aogami Blue steel is an option here for cooks who want a reactive carbon blade; it takes an extremely keen edge but requires drying after every use and will develop a patina.
The petty at 150mm is a complement, not a foundation. Use it for peeling, trimming, and detail work alongside a primary knife. It is not a standalone first purchase.
The sujihiki is a specialist tool. Its narrow blade is designed to pull clean slices through roasts and fish with minimal resistance. SG2 or a higher-tier powdered steel suits this knife because slicing performance is where fine edge geometry pays off most clearly. This is a second or third knife for an experienced home cook, not an entry point.
The yanagiba, deba, and kiritsuke belong at the bottom of this list for a reason. The yanagiba and deba are single-bevel knives. A single-bevel edge is only sharpened on one face, which produces a precise asymmetric cut designed for trained Japanese knife technique. Left-handed cooks need a specifically ground left-hand version; a standard single-bevel knife is functionally unusable for them without it. The kiritsuke compounds the problem with an angled tip geometry that requires technique adjustment even on the double-bevel versions. None of these are entry knives. All three reward cooks who have already spent time on a santoku or gyuto and have a specific, defined task that justifies the learning curve. A complete breakdown of Japanese knife types and their intended uses is worth reading before committing to any specialist shape.
The takeaway
Start with shape, not brand. A santoku or gyuto handles the vast majority of home kitchen work. Every other shape in the Japanese knife family is a specialist tool that solves a specific problem you may never actually have.
Match your steel to your habits. VG-10 and AUS-10 forgive the cook who leaves a wet blade on the counter. Shirogami and Aogami reward the cook who dries the blade immediately and sharpens on whetstones. Neither family is superior in absolute terms. The right choice is the one you will actually maintain.
Ignore decorative finishes and damascus patterns when the maker will not name the core steel. The alloy specification is the substance. The pattern is the packaging. A named steel with a documented HRC range tells you something real. An unnamed “damascus” tells you nothing useful.
One well-chosen knife beats a mediocre set every time. Buy one, learn to sharpen it, and add shapes only when a genuine use case forces the decision.
If this guide leaves you still uncertain, a VG-10 santoku from Tojiro DP in the entry budget band is the most defensible first purchase in the category. It is not the most exciting recommendation. It is the right one.
Conclusion
Japanese knives do not have to be intimidating. By now you understand the key shapes, from the versatile gyuto to the vegetable-focused nakiri, and you know how steel choices affect sharpness, durability, and maintenance. Most importantly, you have a clear framework for matching the right blade to your actual cooking style and budget.
The best knife is simply the one you will reach for every single day. Start with one quality blade that fits your skill level, learn to care for it properly, and build from there.
Ready to make your first pick? Browse our curated recommendations below, sorted by budget and experience level. Your cutting board is about to get a serious upgrade, and once you cook with a well-chosen Japanese knife, there is truly no going back.