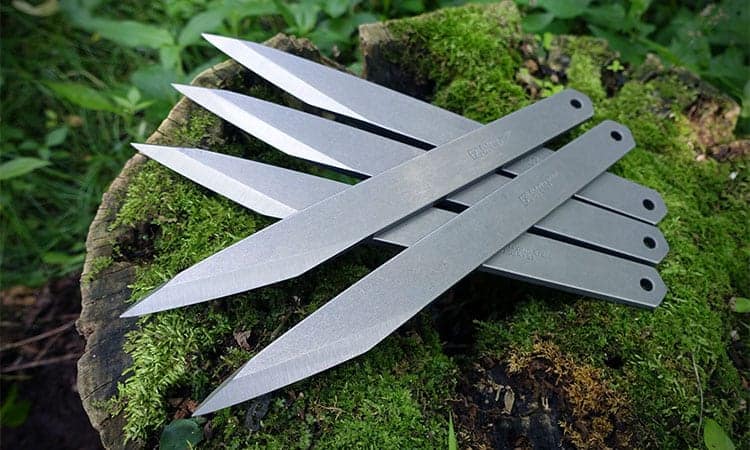
Throwing knives is a fun hobby but can quickly become expensive as you buy more knives.
If you are a beginner and are just starting to hone your technique, you may want to use cheaper knives to practice. However, cheap knives can be hard to find, many of them ranging from $30 to $100.
Fortunately, there is a simple solution to this problem; make your own knives!
This guide will explain how to make throwing knives. We will cover what materials to use and walk you through each step of the process.
Let’s get started.
Best Materials To Use
Before we explain how to make throwing knives, we will cover what materials you need. As with anything DIY, you need to start with high-quality materials to end up with a solid product.
Let’s see what equipment, tools, and materials you need.
Knife Materials
- Piece of paper (A4 size)
- Piece of cardboard (A4 size, 1-2mm)
- A flat piece of steel
Tools
- Soapstone, pencil, sharpie or pen
- Scissors
- Sandpaper
- Bench vice
- Chisel/screwdriver
- Hacksaw (make sure the blade can cut metal)
- Triangular file
- Bench belt sander
When it comes to the metal, there are a few different steels you can use. Many people prefer to use shock-resistant carbon steel such as S5 or S7. You can also use 1075, 1080, 1084, 5160, or 80crv2 steel for throwing knives. Two other great stainless steels to use are EN 1.4301 / AISI 304 and EN 1.4307 / AISI 304L.
The kind of material you use is up to you. You may want to think about what characteristics you want your knife to have before choosing one. Do you want it to be hard or soft? Do you want your blade to be corrosion-resistant? All of these questions will determine what kind of metal to use.
Design of a Throwing Knife
Now that you have everything you need, it is time to figure out how you want the knife to look.
If you like having a bit of creative freedom, try coming up with your own design. If you are not an experienced knife thrower, keep in mind that larger knives are easier to throw.
Furthermore, make sure not to design anything that exceeds your ability. Some throwing knives are harder to throw than others. Stick with a simplistic design if you want to be safe.
If you rather go with a template, there are hundreds of throwing knife templates online you can download.
We highly recommend using a template if this is your first time crafting a throwing knife.
Here is a great template by Christof Weese that you can use.
Rough Outline
Create a Cardboard Outline
Now that you have your design, it is time to make the rough outline. While many people will simply use soapstone and draw the template right on the steel, it may be easier to create a cardboard template.
To start, print out whatever template you chose. Grab a ruler and make sure that the template is the correct size on the paper. Now you can glue or tape the printed template to the cardboard.
With the paper secured to the cardboard, grab a pair of scissors and cut out the outline. Make sure no edges are sticking out. You can also use sandpaper to smooth down the cardboard.
Now that you have your outline ready, place it on top of the steel. You can hold the cardboard in place with a heavy tool like a mallet. Take some soapstone or a permanent marker and trace the outline onto the steel.
Saw the Outline
Now that you have a template to follow, you can saw the outline.
Before you start sawing, ensure that the piece of steel you are working with is clean. Take a wet rag and wipe it down if there are some specks of dust or cardboard on it.
Now you can clamp the steel in your bench vise and make sure it’s tight. There should only be about 20mm of metal between the bench and the saw.
You can also put some thick paper between the bench vise and steel before sawing; this will help prevent scratches on your blade.
Finally, use a file and file down a small groove in the steel at the starting point of where your saw will cut. This small groove will help create a smooth and clean cut.
Now you can start cutting. Make sure to follow the outline exactly. If you are worried about cutting too much metal off, you can always cut a bit outside of the line.
Sharpening
A vital step in learning how to make throwing knives is the sharpening process.
After you finish cutting, file down the perimeter of the blade to remove any nicks and marker/soapstone markings. Using a bastard file and a smooth file will work best for this step.
When it is time to sharpen the end of the knife, you will need to remember that a throwing knife should not have sharp edges. The purpose of the knife is not to cut; the end should only be pointy.
With that in mind, grind the sides of the blade without making it razor-sharp. You can leave a 1-2mm ridge on it.
If you grind it this way, the knife will easily stick into wood targets but won’t cut your skin easily.
Final Touch

Now is the time to add some final touches to your throwing knives.
Filing
The first thing you should do is file down all of the edges of the knife. Make sure there are no sharp edges; this will avoid unnecessary injuries.
After doing this, file down the handle of the knife. What you want to do here is take away enough metal on the handle so that the center of gravity falls in the middle of the knife.
There are a few other things you can do to add some final touches.
Polishing
After you file the knife, you will want to polish it as well. To do this, take some sandpaper and wrap it around a wooden block. Use the block as a grip and polish away.
Polish all sides of the knife so that you create a shiny and even surface. All of the edges should be even as well.
Adding a Handle
Many people like to drill holes in the handles of their knives. There are a few reasons for this. Drilling holes in the handle can lower the overall weight of the knife. Furthermore, holes can increase the grip of the blade. Others will add holes simply for aesthetic purposes.
You can also add a handle to your new throwing knife.
A favorite amongst many knife makers is paracord-wrapped handles. These handles are very simple to add; you can find dozens of tutorials online for this.
You can also add a wooden handle. However, keep in mind that a wooden handle will probably split within a few throws due to force and stress. Most knife enthusiasts who add a wooden handle only do so for show knives.
Lastly, you can wrap the handle in textile tape. Many people will wrap their handle with a bright color to find it easier in the grass.
Testing Your Knife
The last thing we will cover in regards to how to make throwing knives is testing the knife.
Setting Up Your Target
There are lots of places that you can buy a knife target. However, it is pretty easy to set up your own with some materials you already have.
If you have some wood planks lying around, you can use these to build a knife target.
When setting up the target, make sure the grain of the wood is vertical and not horizontal. This will help the knife to cut into the grain easier. If you are going with this option, four 2×12 planks will work well.
You can also use log rounds as targets. Try to get log rounds that have a 20-inch diameter. The larger diameter will help the target to last longer.
If all else fails, use a cereal box as a target until you get a better one.
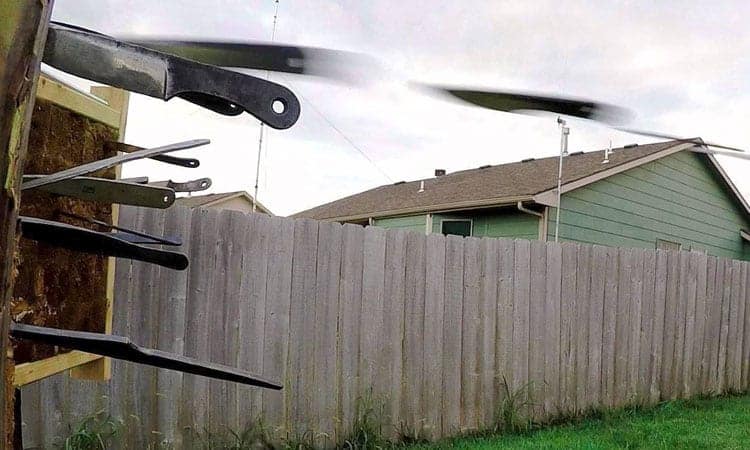
Throwing the Knife
Now you can throw the knife and test how well it works.
- Hold the handle of the knife the same way you would hold a hammer.
- Put your non-dominant foot in front of you, and put all of your weight on your dominant foot.
- Raise your dominant arm so it is perpendicular to the floor/ground.
- Bend your elbow; the knife should be beside your head now.
- Throw the knife, bringing your forearm forward. Your arm should be straight by the time you release the knife. At the same time, shift the weight from your dominant leg to your non-dominant leg. This movement will create momentum.
If it is built well, the knife should easily stick into the wood panel. The knife should remain in the board and should not fall to the ground.
Conclusion
We hope that this guide has helped you successfully learn how to make throwing knives.
You will need several tools and materials for the process, the main ones being a flat piece of steel, sandpaper, a bench vice, and a hacksaw.
You can use many different types of steel, including shock-resistant carbon steel and EN 1.4307 / AISI 304L stainless steel.
The first thing you need to do is design your knife. You can create your own template or download a template from the internet. Then you need to create a cardboard outline and saw the outline.
After those steps, you can sharpen the blade and add some final touches.

